Hydraulic Pulley adventures!

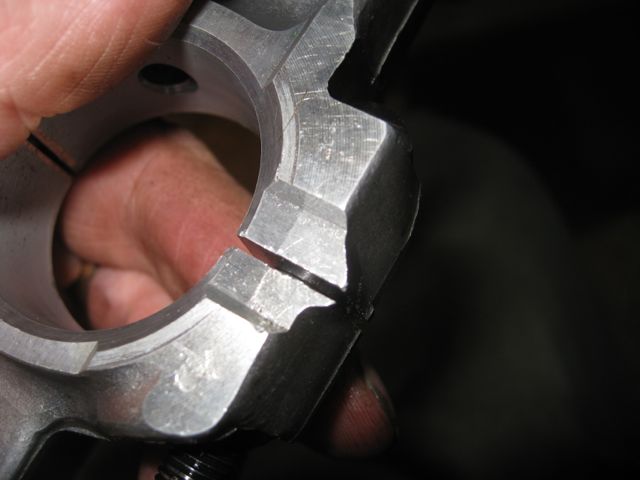
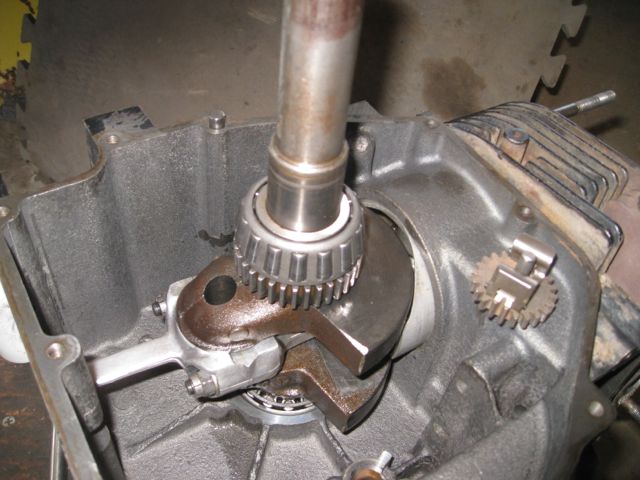
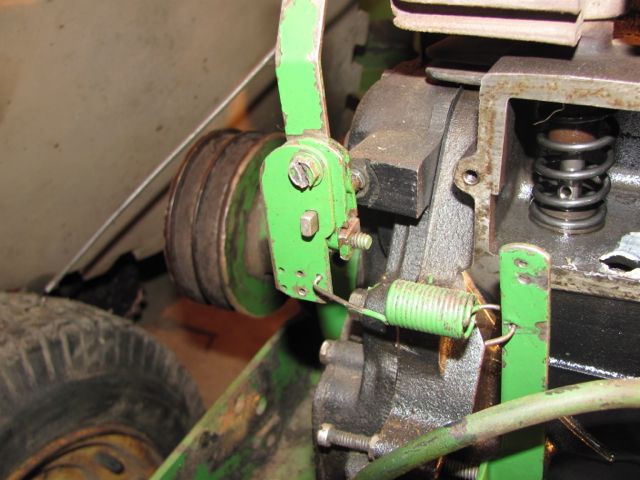
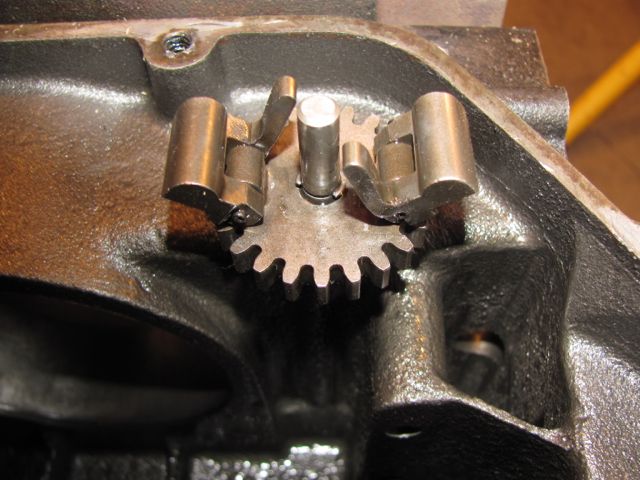
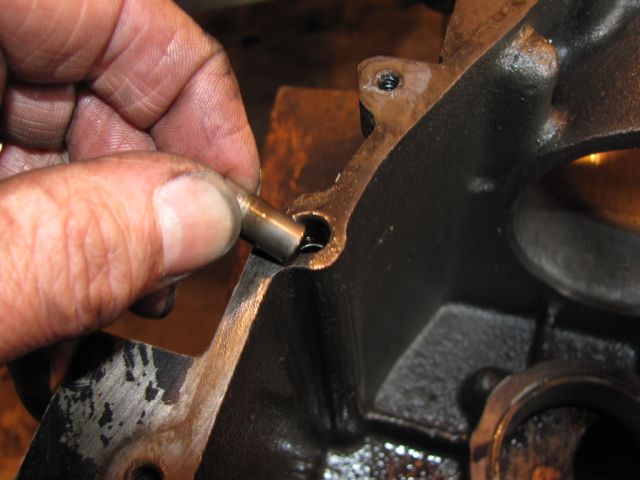
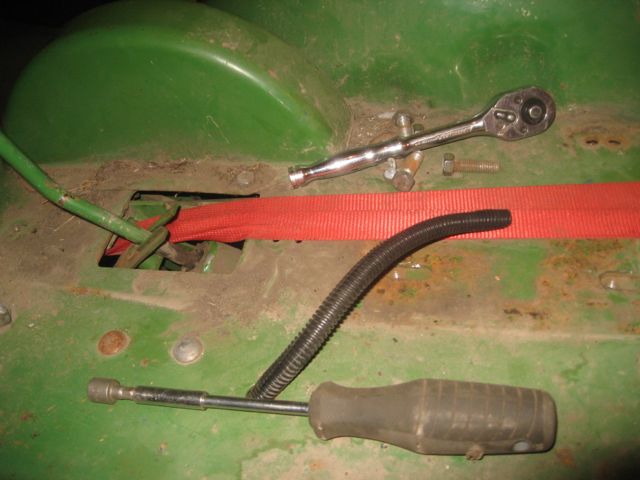
Decided that I would bite the bullet and retorque the head bolts on Wally… To be able to get at the head bolts, I have to pull off his hydraulic pump… Which means pulling the pulley off the hydraulic pump… Sigh… Did I mention that my garage has eaten at least TWO of those little dinky keys off the hydro pulley pumps in the past? Make that… THREE now! So I DID something about it! Now that I’ve used up all the spare chunks of key I had lying around holding the spare pulleys onto my spare pumps, I actually went out and BOUGHT a length of key to cut my own!
Click image for larger version

Name:	key.jpg
Views:	0
Size:	49.5 KB
ID:	884681

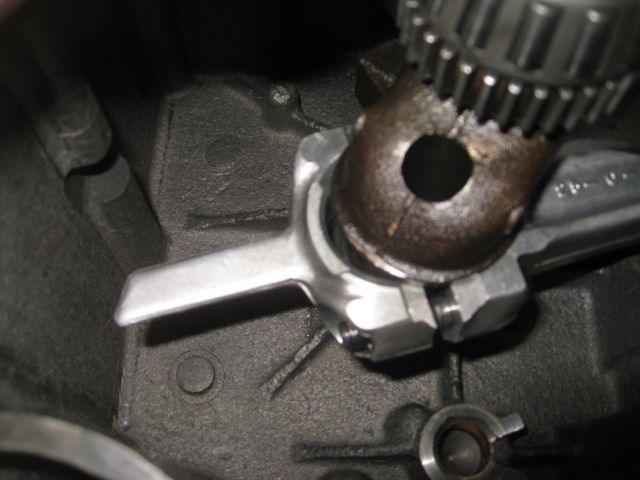
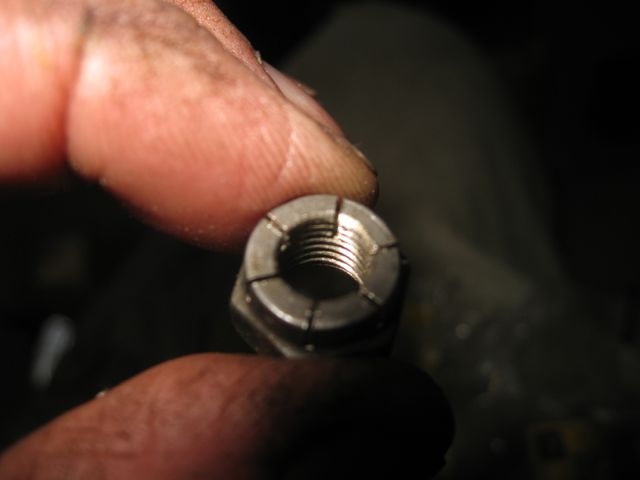
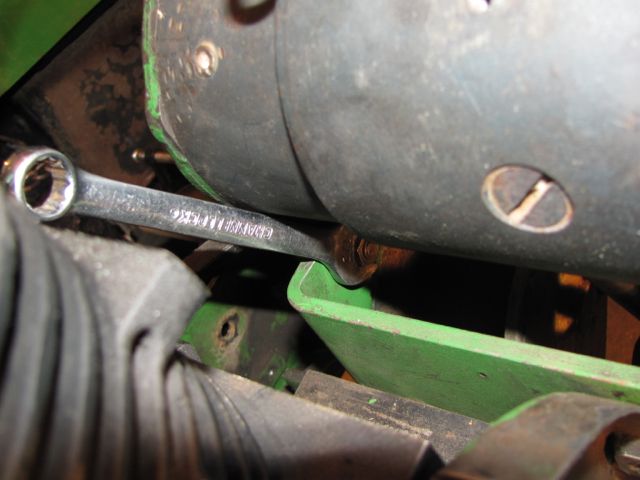
Ta DA! And, just to be thorough, I replaced the ratty, banged up key on Bror’s hydro pump too! Oh, and I retorqued the bolts on Wally’s head. Now I just have to put everything back together! The thing I learned today is that I really should start using the air impact more to pull those stubborn nuts off. I bent Wally’s hydro pulley a bit trying to use a pair of pliers to hold it still while I tried to wrench the nylock nut off the pulley… Thought, why don’t I fire up the BIG compressor and use the air impact? Took that nut off in no time flat!
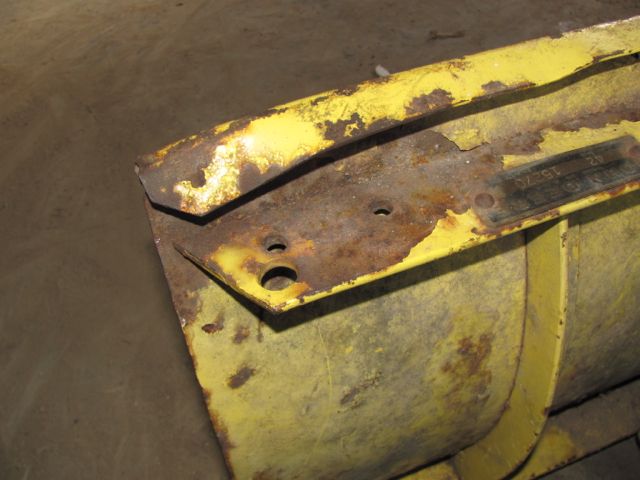
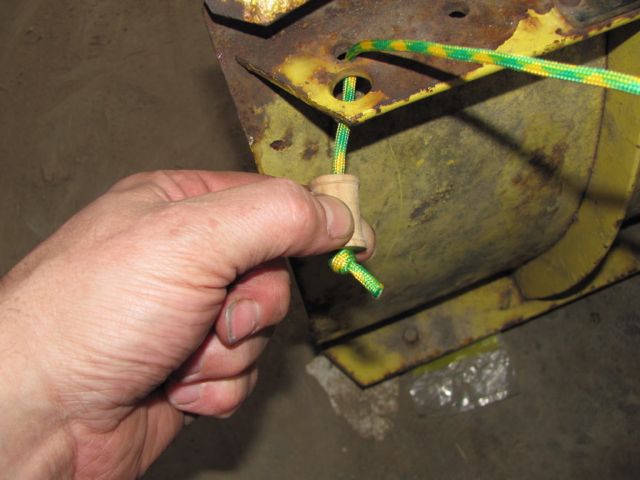
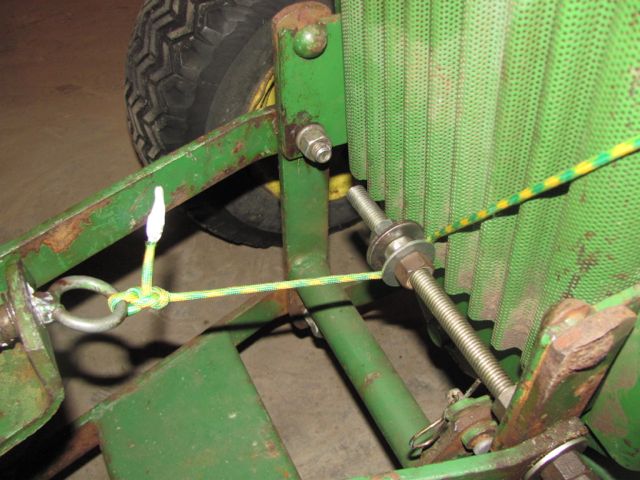
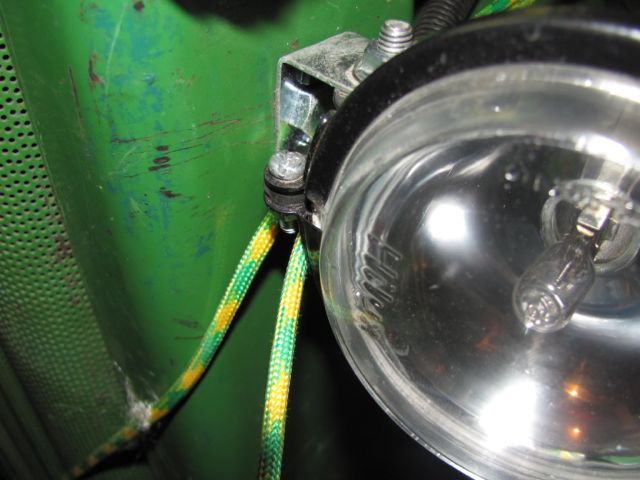
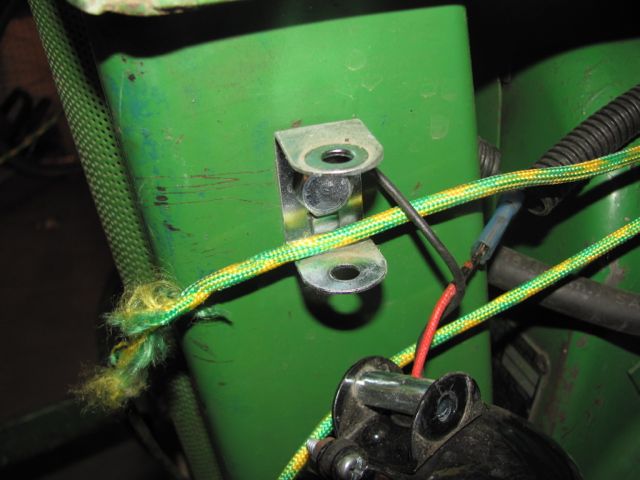
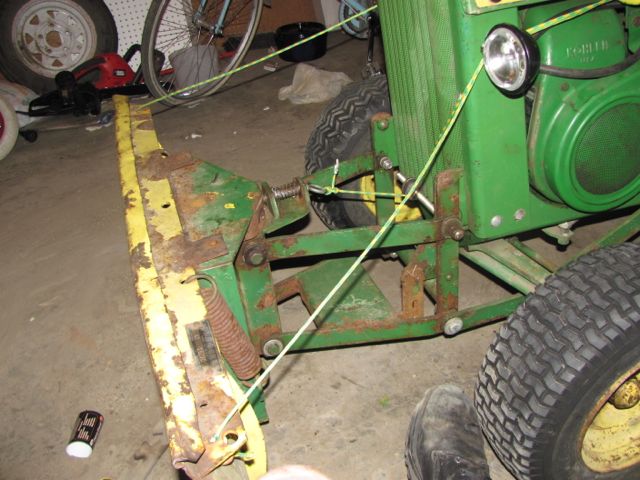
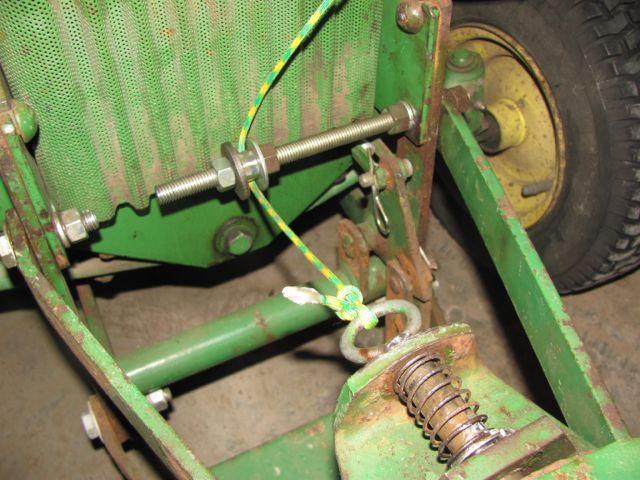
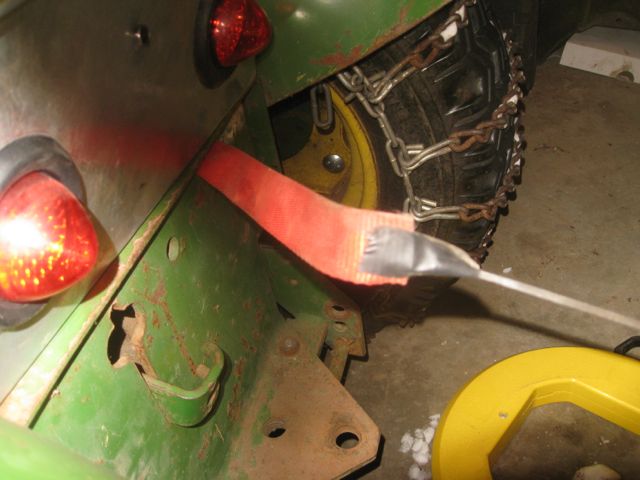
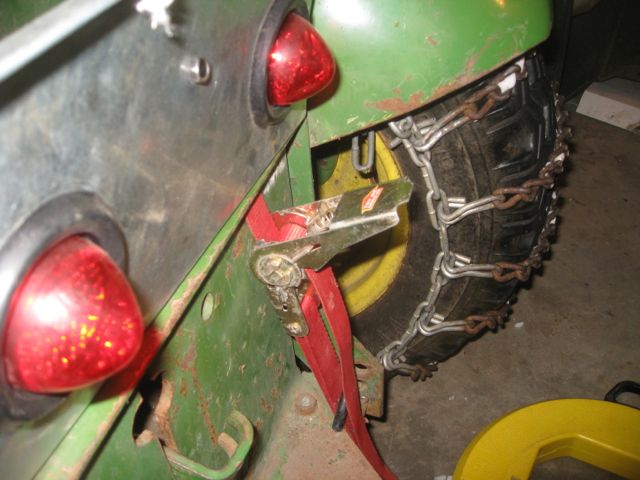
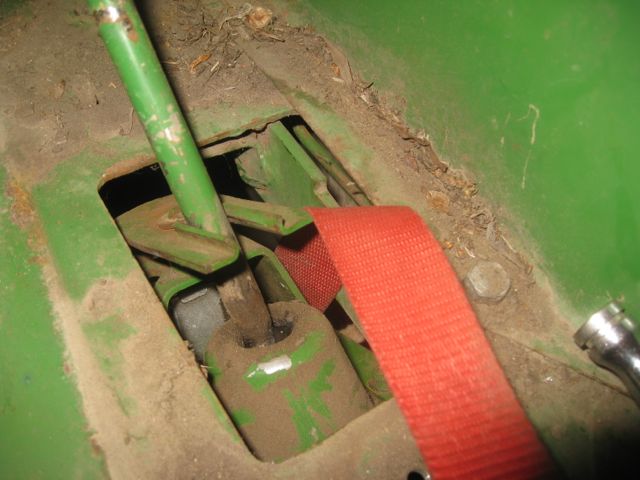
Posted in Wally | Tagged , | Leave a comment

A snow blade project for Wally

Well, I got out and really hammered away on the blade adjuster project tonight!Here’s the holes in the upper corners of the blade that I’m going to use to put the cord through…

Posted in Wally | Tagged , | Leave a comment

What a NICE summer day!

Well, today was officially a nice day! Weather-wise AND tractor-wise! Got back to working on Bror’s engine this afternoon… Here’s some details of what the engine shop did with the valve guides… Those look like copper sleeves…


And I THINK this is a new exhaust valve seat!


Since it was so nice and warm, I got out a pail of nice soapy water…

Here’s after the bath, and after a bunch of drying off with the air gun

First step, find the bearing retainer plate,


and attach it finger-tight just for holding the crank in for now….

Lie the block down in preparation for dropping the crankshaft in,

Made sure I knew where the alignment marks were on the rod and cap, and that I had them oriented the right way…


Didn’t take any pictures of me fighting with the piston ring compressor, but I must be getting better at THAT part, because it only took me two tries to get that nice oily piston into the cylinder!

Got the connecting rod cap on… that’s always a bit dicey

Here’s one of those dang expensive lock nuts!

Got the con-rod nuts all torqued on, hit the cap with a drift as per the manual, then retorqued…

ALMOST forgot to pop the tappets back in!

Got the timing mark on the cam shaft all lined up with the chamfered tooth on the crankshaft! Yay! (this was a tough shot to get, it actually broke my old camera… All the attempts to get the macro to see the two marks in focus finally killed the lens motor on my tractor-cam! Thank goodness LTGal has upgraded recently so I can have her hand-me-down! Lemme know if you see any difference in my pic quality from here on in!).


Got the crankcase gasket all set on it…


And here it is, all buttoned up! 


I think I’ll stop at this point and take it back to the small engine shop to get the valve clearances done… They’re SUPPOSED to be 0.010 cold for both… I’m clocking in at around 0.006 according to the feeler gage. So, Monday afternoon maybe… I MIGHT get the crankshaft end play figured out yet this weekend, but I don’t think I’ll go much further than that… Don’t want to have to carry too much weight around… I wonder if they need the valve springs in there… Probably not, since they have to pull the valves to grind the ends, don’t they?

Posted in Bror | Tagged , , | Leave a comment

More Man-Food By LittleTractorGuy

Well, I figure, since its been nearly two years since I posted my LAST hit recipe, I better, you know, post something for my legions of fans… I call this…

Easy, Breezy Margaritas!

1. Fill a 2 cup Mason Jar 1/2 full with Kirkland Premium Margarita Mix
2. Add 2 oz of Tequila
3. Fill remainder of jar with ice

4. Place Oster blender cap and blades on Mason Jar mouth, tighten securely! (Note, ensure that the rubber sealer ring is appropriately placed between blade assembly and Mason Jar. This is VERY important!)
5. Attach Mason Jar to your Oster blender
6. Briefly press the Crush Ice button
7. Remove Oster blender cap
8. Enjoy!


Who knew Margaritas could be THIS EASY?!? Well, actually, LittleTractorGal did, she left me explicit instructions on how to do this before she left on her 2 day knitting retreat! I had NO idea that the Oster blender cap was designed specifically to fit standard Mason Jars! 

Stay tuned for tomorrow, when Littletractorguy braves…. THE BARBECUE! to cook BURGERS!

(dang, this little two cup mason jar didn’t even make enough Margarita to last me the entire post! Now I gotta practice some more! )

Posted in Man-Food By Littletractorguy | 2 Comments

Electrolysis Tank MK II Test run

I know you’ve all been on the edge of your seats wondering whether the Mark II tank was going to get running, be a big flop, or possibly brown out the entire neighbourhood…. Well, 

The wait is OVER!


Here it is, all filled up, with the washings soda added! No leaks! (Whew!) Substantially more water than the Mark I tank, 27 gallons to be exact… So, just a bit under 3 cups of washing soda, using the approximation of 1/2 cup per 5 gallons. Can’t find my toilet brush from last year, so I made do with a snow brush for trying to stir it all in…


I decided I was a bit nervous about placing the threaded rod so close to the electrodes, what with the possibility of causing a short if I bumped the rod at all, so I figured I’d use some of my major-sized heat-shrink and heat-shrink the ends of the rod…


Here’s the other end. The rod fits nicely lengthwise, so it should let me hang a number of things…


I was STILL kinda nervous about not having a way to secure that rod into place, so I MacGyver-ed something up… two 4″ chunks of primed baseboards (it was a cutoff I had lying around) fit just perfectly into two slots that had been moulded into the edge of the tote (for what reason, I have no idea)… A few minutes with my round rat-tail file to make some nice divots in each, and I feel MUCH better


Almost ready to go! You can’t see it in the cloudy water, but I suspended both the lid and the pot from the rod… The nuts and plate washers seem to work pretty darn well for holding the heavy gage copper wire…


Ran my extension cord and set up the battery charger… And…


made my connections… Pos to the electrodes in the tank, neg to the rod suspending the cast iron…


Just add power! A good steady three amps!

And what’s a trial without a movie?!?! 

httpss://www.youtube.com/watch?v=IKx3dnQjz9E


I’ll go out in a bit, once I thaw out totally, to see how it looks….


Well, after an hour, it looks like this!

etankmk29


And its drawing even more current!

etankmk210

Posted in Tools, Tractor Repair Stuff | Tagged , | 1 Comment

Easter tractor playing

Well, happy Easter everybody… I stole away from the family festivities for a while to get some tractor-playing time in… Figured what I should do is pull the Tec HH100 out of Bror and get it ready to go into the machine shop to get the valve guides done… So, pulled off all the hardware… the external governor stuff

(took this one so I’d remember what the spring settings were on reassembly)

the generator 

(took this one to remind me what kind of a PITA it is to get into the gen mounting bolts… Maybe when I put it back together I should come up with a chunk of 5/8″ rod to use instead).

Got everything pulled off, drained the engine, pulled the crankcase cover off and pulled the cam, the tappets and the piston… The only things I couldn’t get off were the governor spool


which is held on by a c-clip that is an absolute royal pain to get off… Maybe I’ll see if the engine shop I’m going to has any ideas about that…

the little spring-loaded stud from the side of the crank-case


because I’m not sure how the heck to take the spring out…

And the adjustable crankcase bearing cup

which I hadn’t realized until now was actually an adjustable piece! THAT’S what those shims do when you’re trying to adjust the crankshaft end play!

So this leaves me with a FAIRLY naked crankcase


So, tomorrow I call the shop and see if they can do a valve guide job on this puppy, find out what they would all need to have in order to do my valve clearances, and then I see about ordering 

AM31096 GASKET KIT 1 (CONSISTS OF (2) M41814, M42149, (2) M42221, M42179, M42180, M42181, M42193, M42194, M42195 AND M42202) ENGINE OVERHAUL

and 

M41792 NUT 2

which are the lock nuts for the connecting rod.

Hopefully it will warm up some, its still too cold to be comfortable out in the garage…

Posted in Bror | Tagged , , | Leave a comment

Mk II Electrolysis Tank setup

Well, in hopes that spring will EVENTUALLY arrive here, LTGal and I embarked upon the first stages of developing the Mark II Electrolysis tank… Which were to secure a more suitable, well, tank! So, off to Canadian tire we went, this morning!

(Who are we kidding?!? We were trying to escape cabin fever!)

So, while we WERE intending just to go and take measurements of the different plastic bins that were available there, we happened across THIS in the clearance aisle!


And not only was it on sale, it was made of relatively substantial plastic AND (according to an unnamed source) already an icky colour so we didn’t have to worry about it getting even ickier! 

It’s both longer and wider than the Mark I tank, but shorter. However, its only about an inch and a half shorter…


and since the Mark I tank had the electrodes bolted through the plastic I was losing the top 2-3 inches of the tank anyway unless I wanted to have the electrodes totally submerged… which made them icky! So, plan THIS time is to come up with some way, NOT involving welding, to create electrode holders that can dangle over the edges of the tank…. Some bolts, nuts and spacers will likely be in order. The advantage of this approach, of course, is that then I can bore holes in BOTH ends of the electrodes and flip them around as one end gets used up…


Well, the Mark II is shaping up nicely…
Click image for larger version

Name:	ImageUploadedByMyTractorForum Free App1396821321.169007.jpg
Views:	11
Size:	264.6 KB
ID:	747266
Click image for larger version

Name:	ImageUploadedByMyTractorForum Free App1396821385.526247.jpg
Views:	10
Size:	204.3 KB
ID:	747274
Click image for larger version

Name:	ImageUploadedByMyTractorForum Free App1396821427.678051.jpg
Views:	11
Size:	230.3 KB
ID:	747282

Last step is to bore a hole and mount a drain in it with some silicone and a chunk of cork for backing.

Click image for larger version

Name:	ImageUploadedByMyTractorForum Free App1396821566.595255.jpg
Views:	9
Size:	184.5 KB
ID:	747290
This oughta do it.

Kudos to Boyd on MTF, whose adjustable shelves using threaded rod inspired me to use rod for my hangar/cathode…

Posted in Tools | Tagged , | Leave a comment

Uh oh! Little problem with Wally

Had a little problem with Wally yesterday morning…

Click image for larger version

Name:	ImageUploadedByMyTractorForum Free App1394041917.365969.jpg
Views:	43
Size:	161.6 KB
ID:	703129
Click image for larger version

Name:	ImageUploadedByMyTractorForum Free App1394041942.540812.jpg
Views:	43
Size:	157.3 KB
ID:	703137

Was pushing snow, sitting on the nice warm cushy seat, pushed in the clutch and “SPANG!” I heard a noise even over the sound of the engine! And suddenly my clutch won’t return… And i’m down to 2 speeds… Slow and Stop!

Found the above spring lying on the ground when I came back around….

Uh oh!

Time to hit JD Parts and phone Mother Deere!

$13 bucks overnight according to Deere, then I’ll be back in business…  
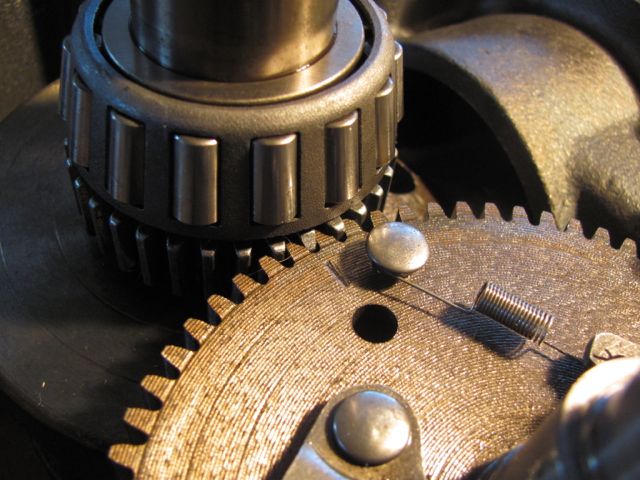
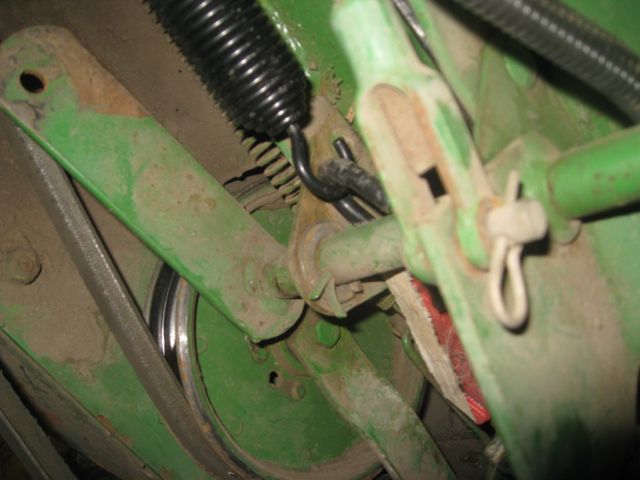
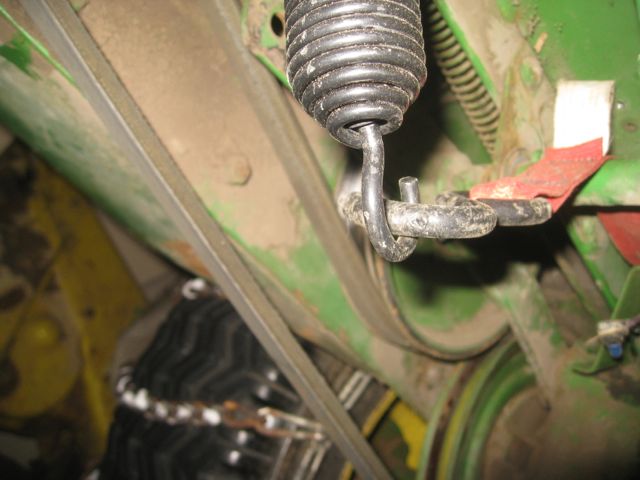
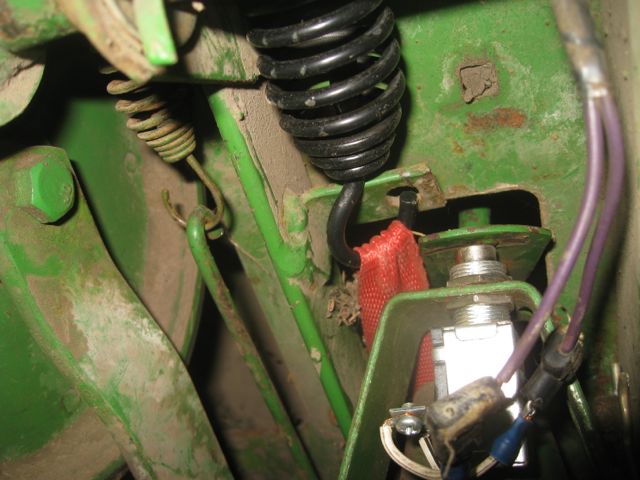
Guess I can’t expect a 57 year old spring to last forever!

I had the replacement spring by 9:15 this morning…

Click image for larger version

Name:	ImageUploadedByMyTractorForum Free App1394130089.488905.jpg
Views:	7
Size:	197.3 KB
ID:	704361
Interesting… same PN as the original, looks like they’ve gone with a newer design. I can understand why, it makes for a more rugged hook end and less chance for metal fatigue at the very end of the coil (which is where the original one broke, and where the bulk of the stress would be I imagine).
I got out tonight after LTBabe tucked in and Kidlet #1 was doing homework, to put the new spring on.  I had been worried about how the heck to pull this massive spring back 6 inches into a confined spot, but I figured…. Just had to think smarter, not harder!

First, I thought, I’d fish a line through the back of the tractor…

Then pull a winch strap through…

and hook the winch strap up to the spring…

and just winch the spring back.

The fatal flaw in THIS plan was that the winch strap hook was too big to fit past the neutral start switch bracket and wouldn’t come far enough back or get close enough to the mount point for the hook… Okay, plan B… pull the seat, the shifter quadrant and the lights off, then run the winch strap down through the shifter hole…

then hook on to the spring and pull it back to the mount point. Unfortunately, THAT was a bad idea too, again because the hook was too big to fit horizontally out the hole past the neutral start bracket, and by the time I got it that far back there was NO way to shift the hook at all, the tension was so tight on it… So, some way to get a thinner pull on the spring…

How about doubling back with the winch strap, and

hooking the STRAP itself to the spring!

Oh my goodness did THAT ever work slickly! I was able to pull the hook RIGHT into the mounting hole, AND let the tension off the strap without destroying everything!

A perfect bullseye! And, I’m happy to report, Wally’s variator functions perfectly now! He even shifts better, I think! By the time I was done strapping everything back together, however, it was 10:30 PM, so no chance to go out and push snow tonight!

Posted in Tractor Repair Stuff, Wally | Tagged , , | Leave a comment

There really are some awesome people on MTF!


That certainly got reinforced for me in a most amazing way on Tuesday!LTGal and I were sitting down over our wheaties this morning when the postman rang the bell…

We’d ordered a set of replacement cordless phone batteries from Amazon a couple weeks back, so when the postman showed up with a box, we thought

GEEZ, Amazon’s sure engaging in over-packaging for a couple small batteries… I was totally flabbergasted, when we opened the box, to see THIS:

Oh my goodness! An anonymous friend who shall remain nameless, who had obviously heard me moaning on MTF about my frozen tuckus, sent this along to me! And just in time, since more snow is falling as I type this post!

And, of course, don’t forget, the value add of the big box!

So, before darkness fell, I went out and installed it

It is AMAZING! Cushy and warm, and I particularly like the drawstring for holding it on! Works VERY well! So, even tho there wasn’t a lot of snow yet, Wally and I went for a spin… After a half an hour, I could STILL feel my tuckus! 
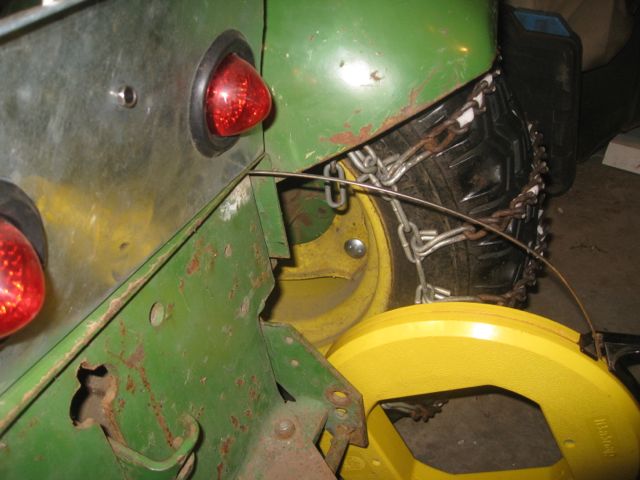
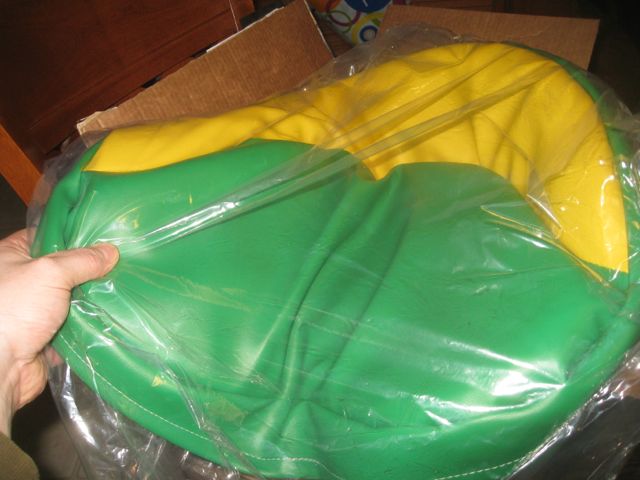
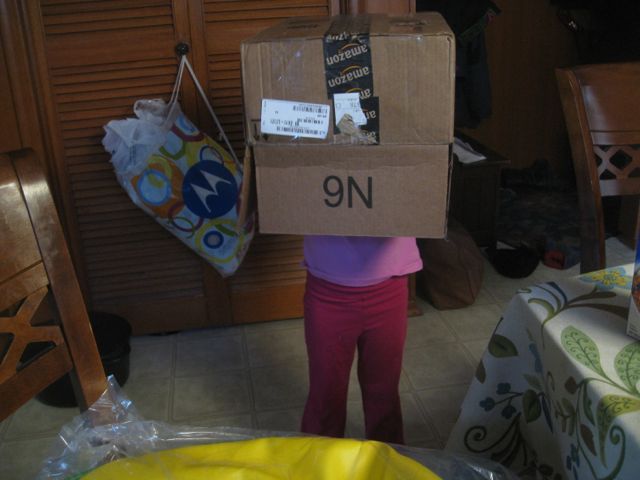
Thank you so much, anonymous friend, for saving my butt! 

Posted in Uncategorized, Wally | Leave a comment

Happy happy LittleTractors!

Just had to share! The LittleTractor snow-fighting team is officially 2/3rds functional! Got Wally for pushing snow, and I FINALLY got Littletractor’s blower to work again!

I changed the blower belt early in the fall, but didn’t actually DO a runtime test on it… So first big snowstorm shows up in November, I go and flip the PTO switch and BAM! Off pops the belt! Three times I’ve tried getting it to work since November, the first two when it popped off it twisted on the drive pulley so I had to actually pull the blower and reroute the belt… I could NOT figure it out! Everything spun freely, nothing was binding, no twists in the belt (at least, not until I hit the PTO)… Finally, today I got out to the garage for a couple hours because it was above -19 c out there, I pulled the blower off, pulled off the idler and the main drive pulley so I could reroute the belt AGAIN, put everything on, hit the switch and BAM! off pops the belt… Put the belt on, checked the routing around the mule drive and the PTO, everything looked like it should… Hit the switch and BAM! off pops the belt. THIRD time I put the belt on, I figured, screw it, I’m not going to take all the time to tighten up the mule drive like I usually do (usually wind it in about an inch and a half). Instead, I only tightened it about 1/2″. Fire up Littletractor, hit the switch, and [Insert chorus of singing angels here!] it SPINS!

So the whole time since November, my problem has been that I’ve been tightening down the belt TOO MUCH! I knew my old one was stretched, because it tended to pop off a LOT, but I didn’t think it was THAT stretched! Took Littletractor out and cleaned off that patch of the neighbours’ sidewalk that I’d been avoiding because Wally’s blade gets bunged up between their hedge and the light post, and Little performed flawlessly!

 Whoo hoo!! Woot, woot! I couldn’t be happier!

Well, okay, I COULD, but what it would involve is a valve job on Bror and the attachment of a certain front-end loader to him! THEN the LittleTractor snow removal team would be complete!

Posted in Littletractor, Wally | Leave a comment