A Day In The Life of…. Cranky!

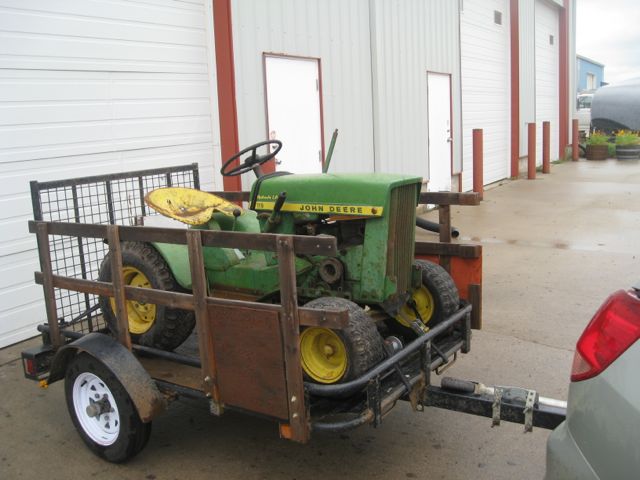
So, I got out to my dad’s warehouse today where Cranky has been in storage since, oh, last November, I think… Blew up his tires, went to roll him out – URK! No roll-y! DANG IT! Brake was off, shifter in neutral, but no spinning of the wheels! Fortunately, my dad is handy with his forklift, and got Cranky all loaded up…

After a bite to eat, I went to head back home… Before I left, I figured I’d take a peek under Cranky and see if I could see anything wrong… Well, the brake/clutch pedal was pretty loose all the way down to the last few inches of pedal, and the variator lever just barely does anything…. So something was jammed… Worked the brake pedal a bit, then decided to just head’er out and hope I could drag him off the trailer…

Got Cranky home, backed the trailer up to the back gate, let the end gate down on the trailer, undid the straps, got ready to have NO fun dragging a 600 pound tractor off my trailer and…

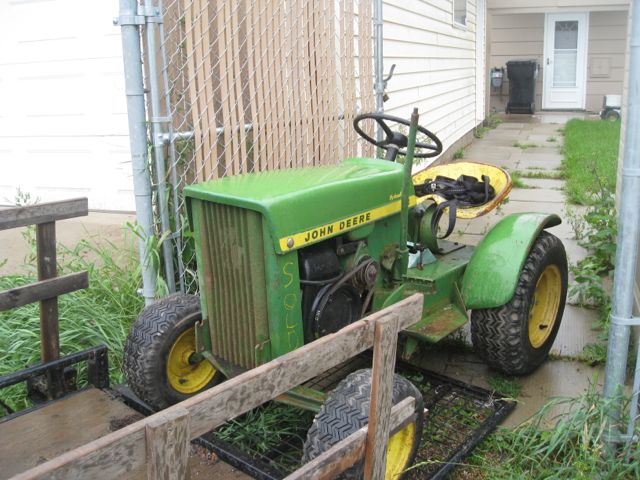
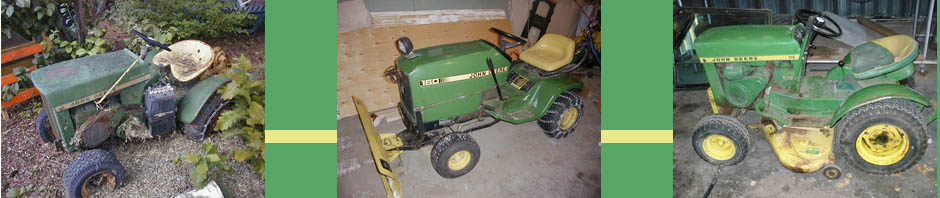
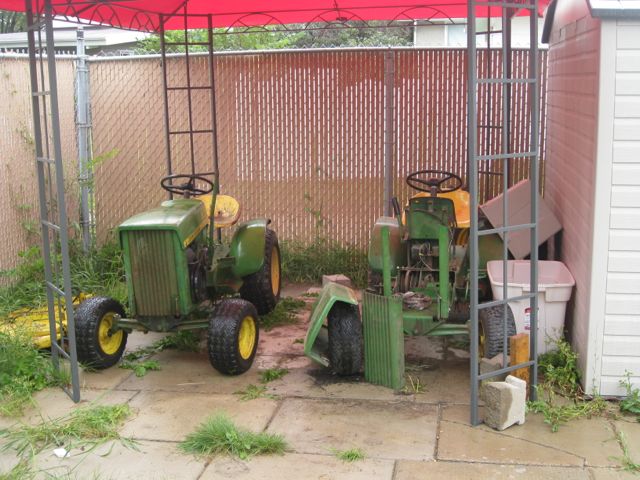
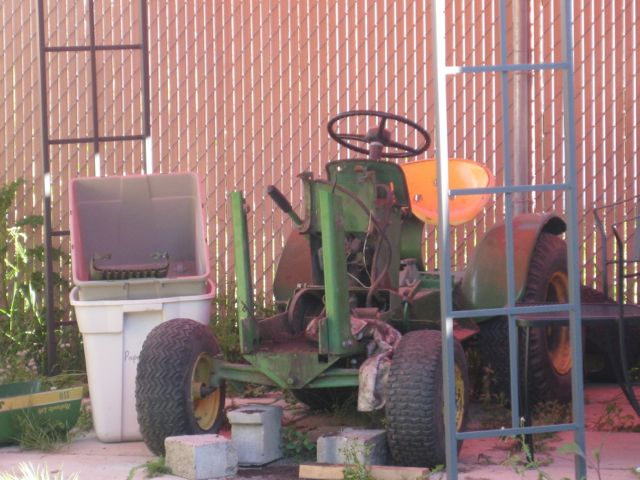
he just rolled right off as easy as you please! A little bit of pushing and some steering and some rearranging, and now here’s my two buddies, out under the sunshade!

Of course, now……

I can put my evil plan into ACTION!

buh-BUHBUH!!!!!

And so, I popped the hood on Cranky and the first thing I found was…. What the heck?

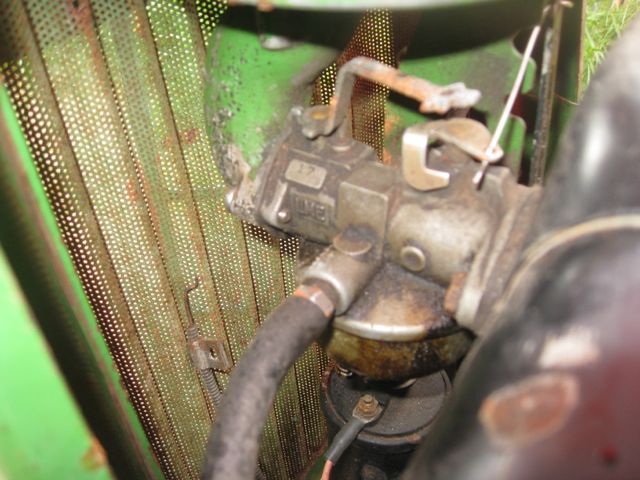
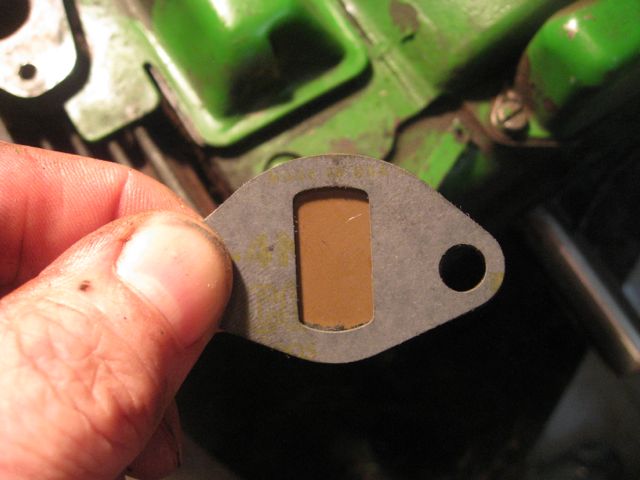
Cranky’s got a Walbro LME carb from a 112 on him! And I noticed, a NOT connected choke linkage… AND, I also noticed,

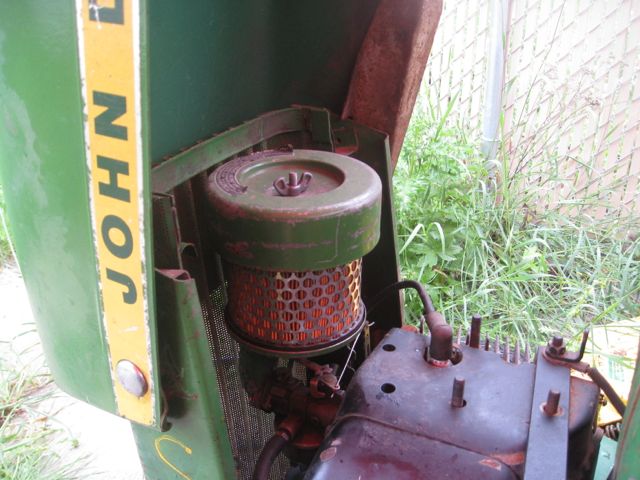
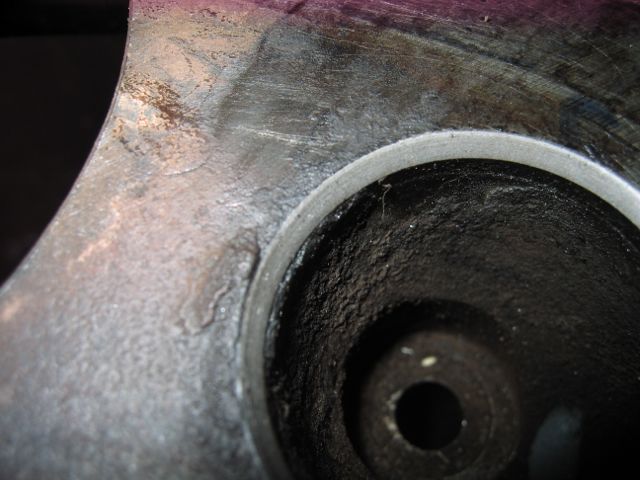
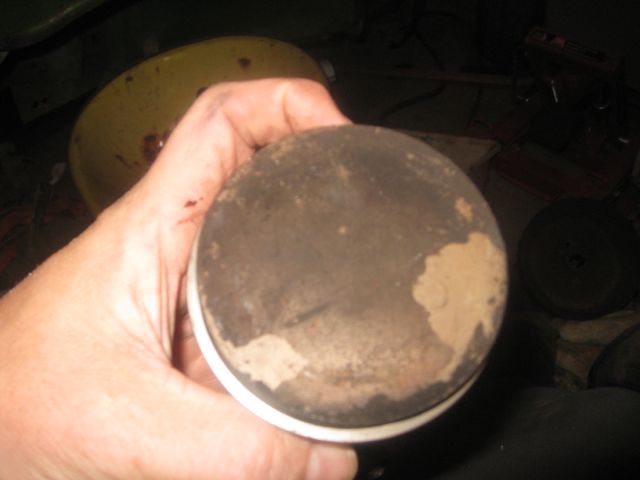
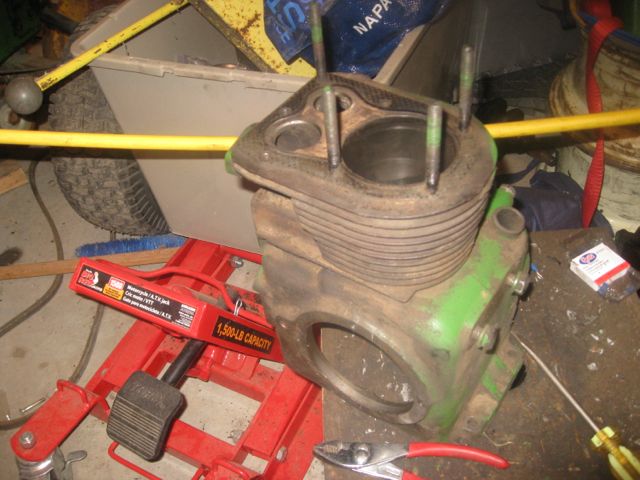
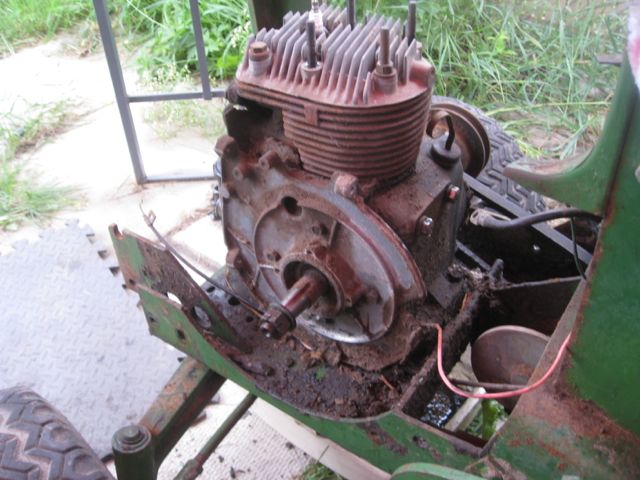
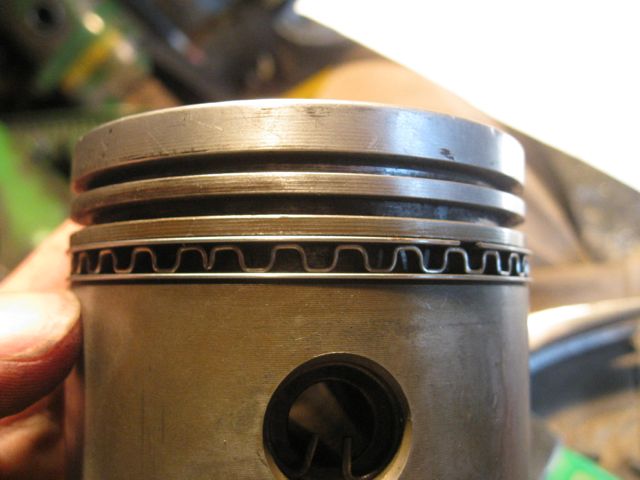
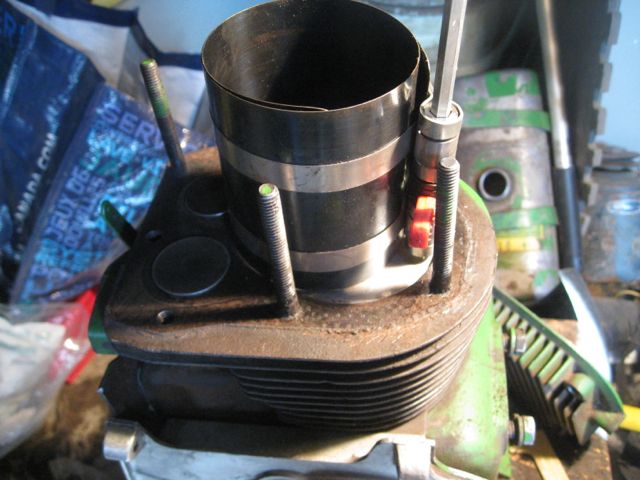
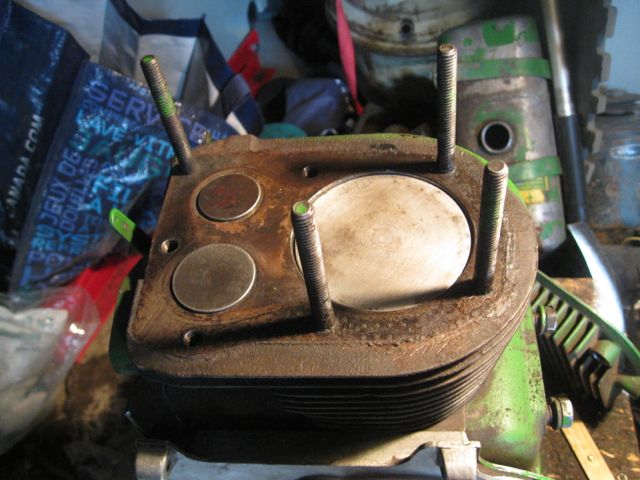
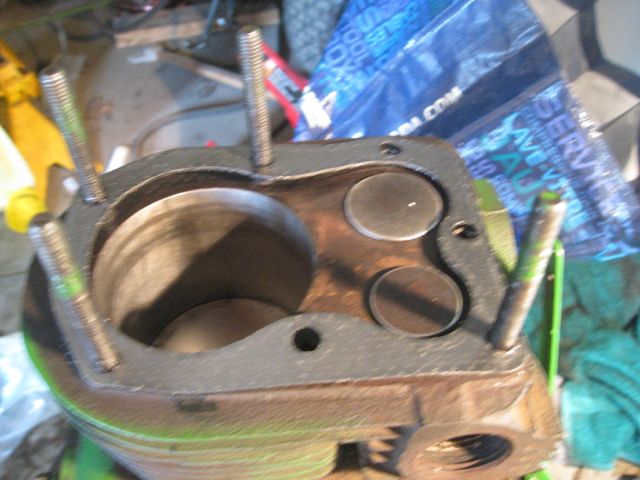
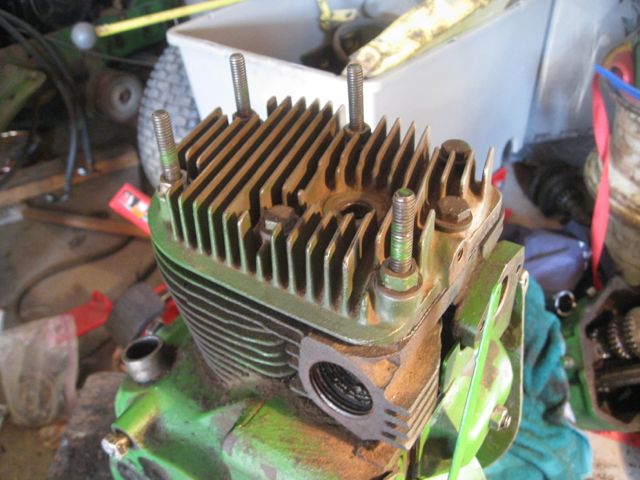
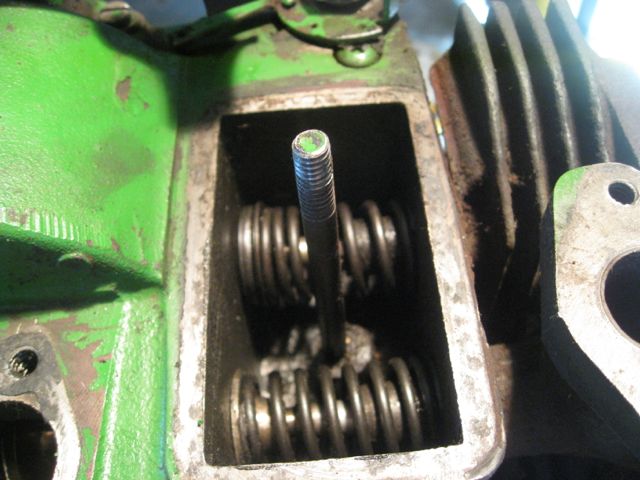
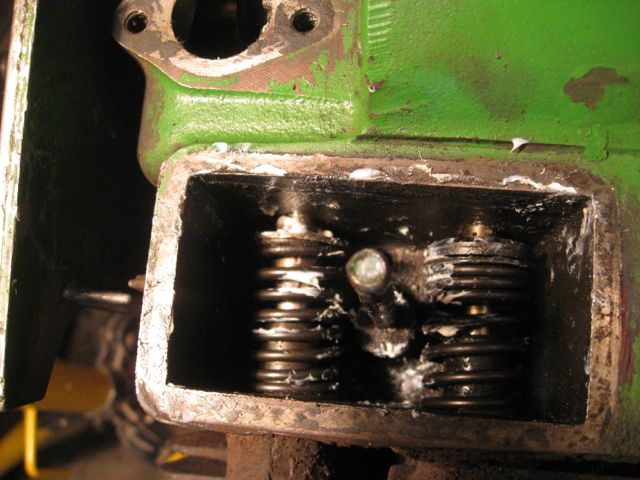
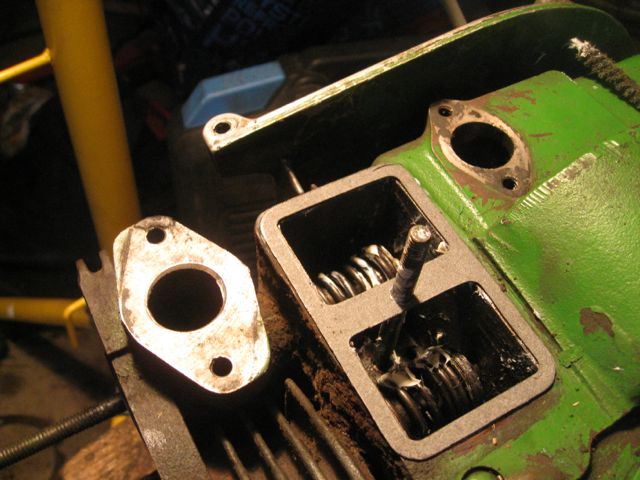
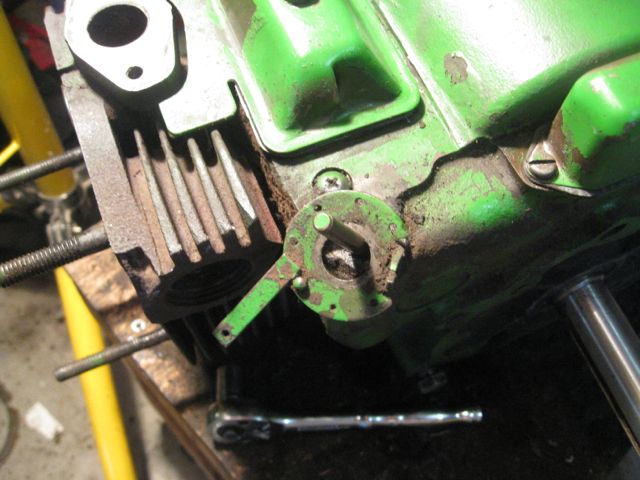
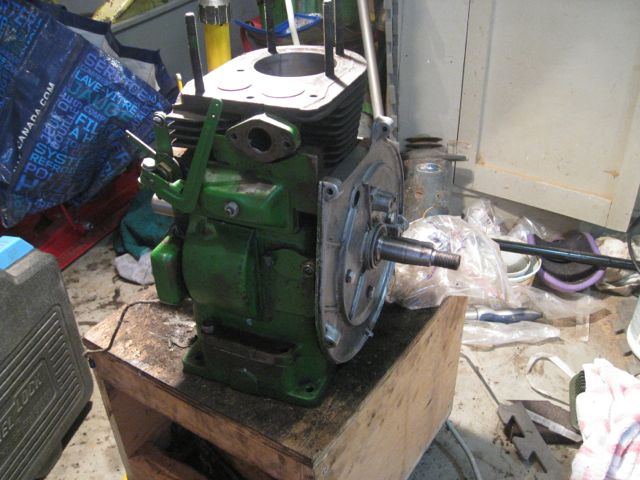
the air cleaner assembly from a 112 as well! Whoa! I haven’t even STARTED and already we’ve got shades of Frankenstein! So, I pulled the tins off, and went after the head… It came off really nicely, BUT….
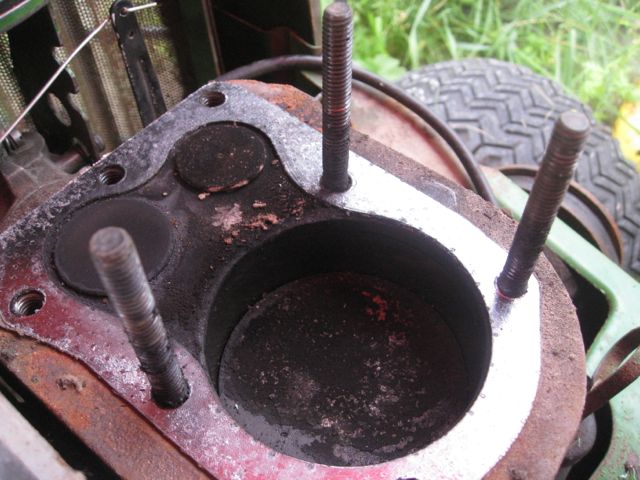
and

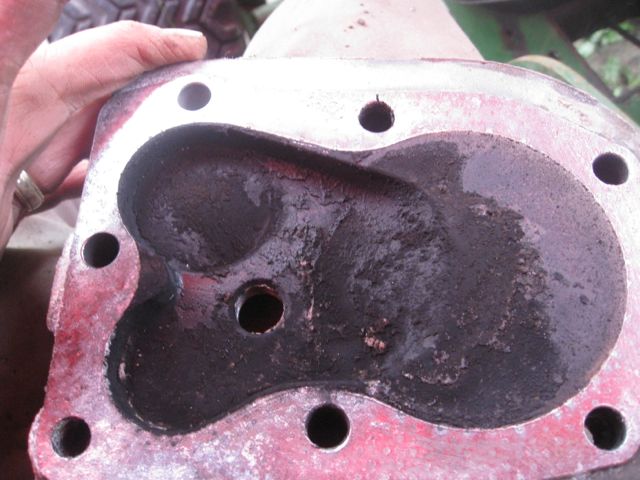
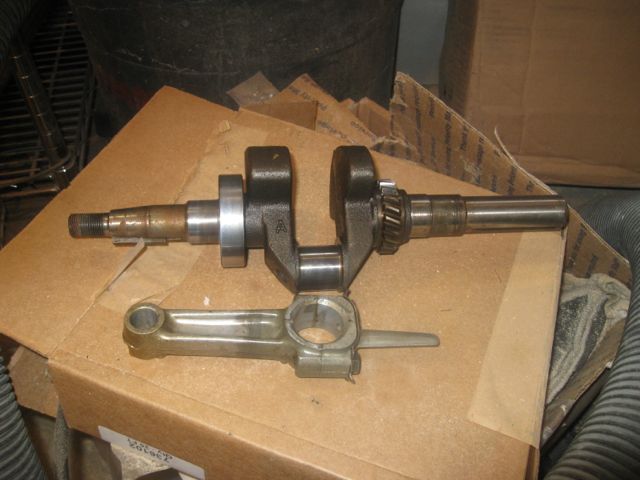
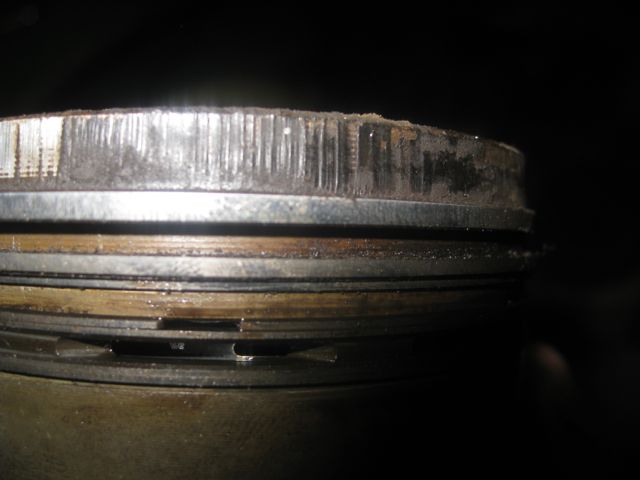
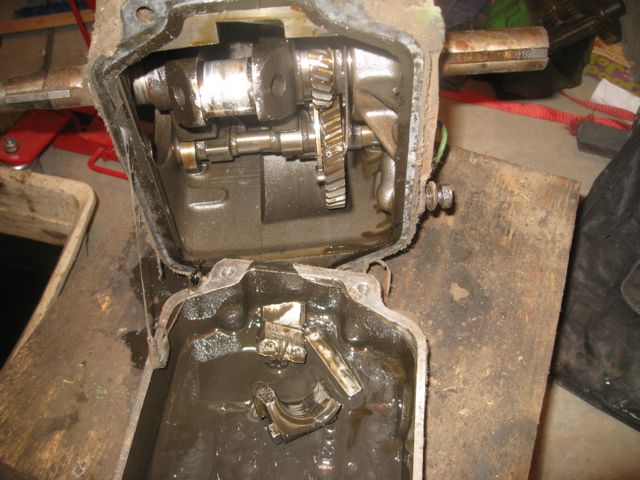
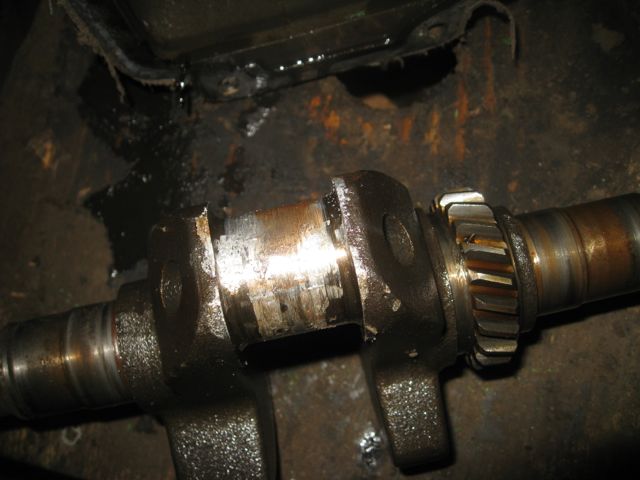
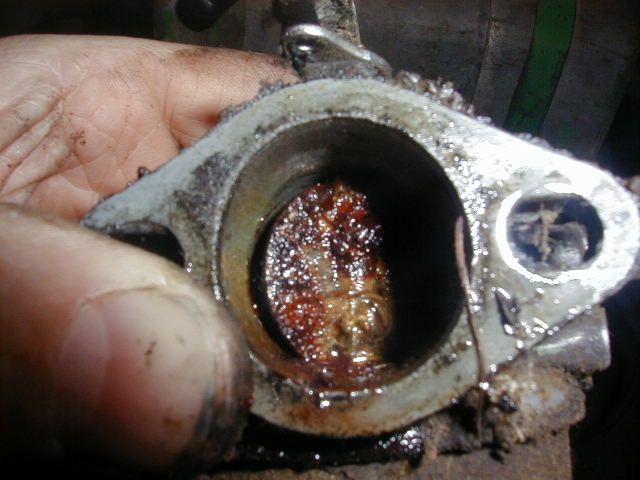
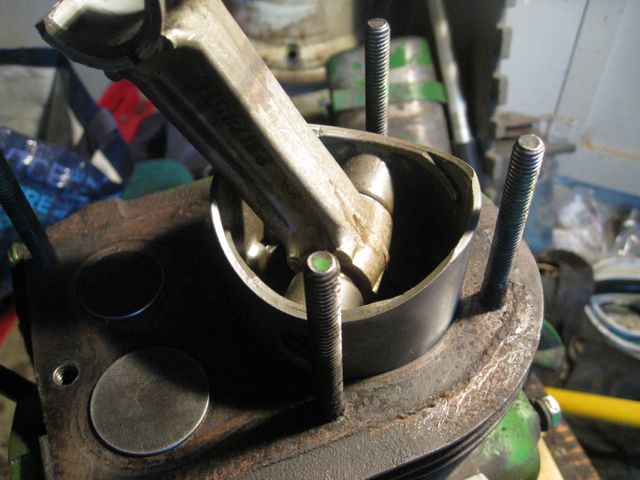
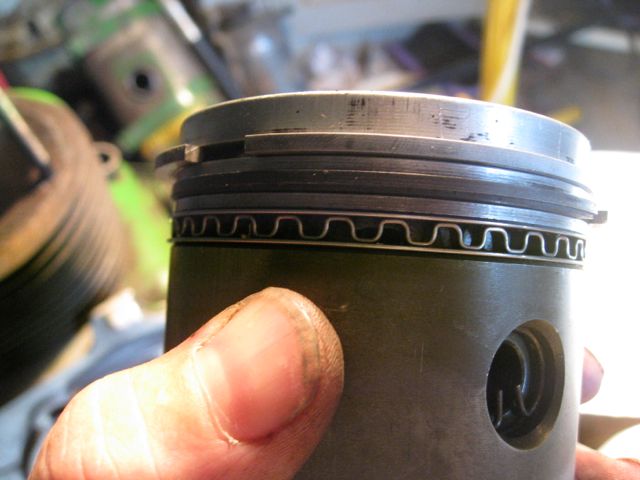
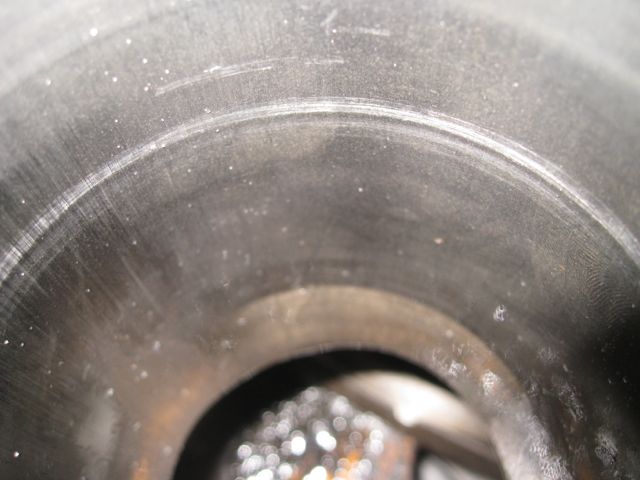
Back as midnight, all along the cylinder walls and on the head, AND (not surprisingly) no connecting rod…

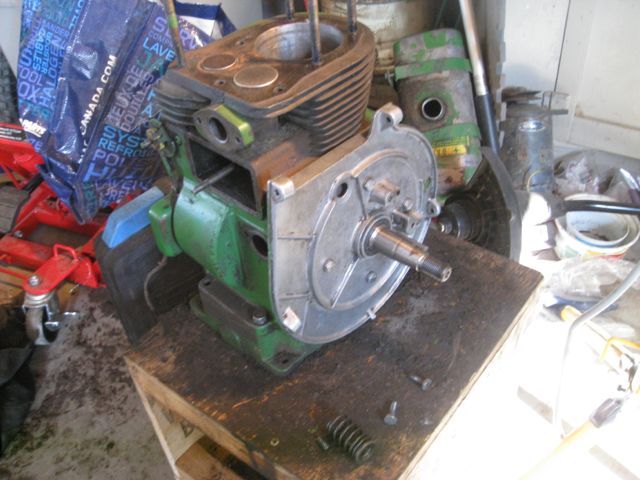
Well, might as well pull THIS engine out too, since I need some bits from it!

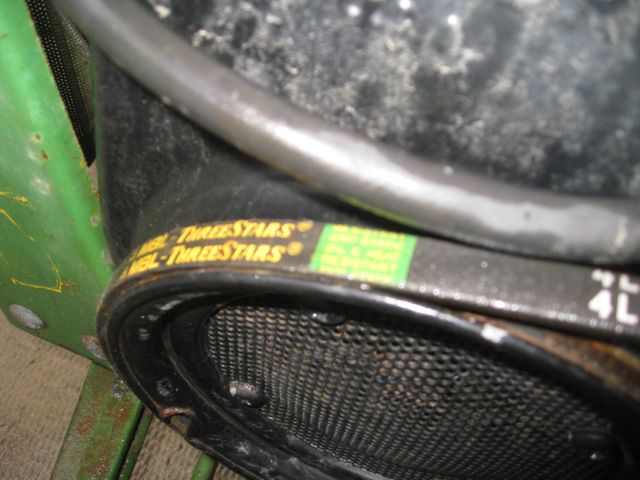
Its got a nice new starter-generator belt,

and I was able to pull off the generator mount for use on Wally, as well as the piece of frame that Wally’s PO had butchered when they did their home-repair on his generator mount…

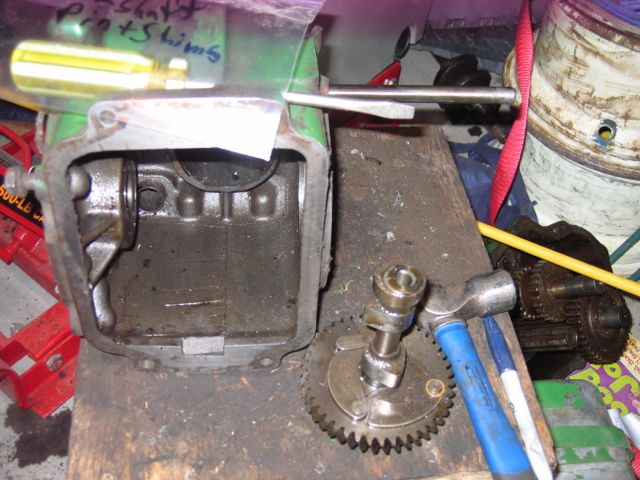
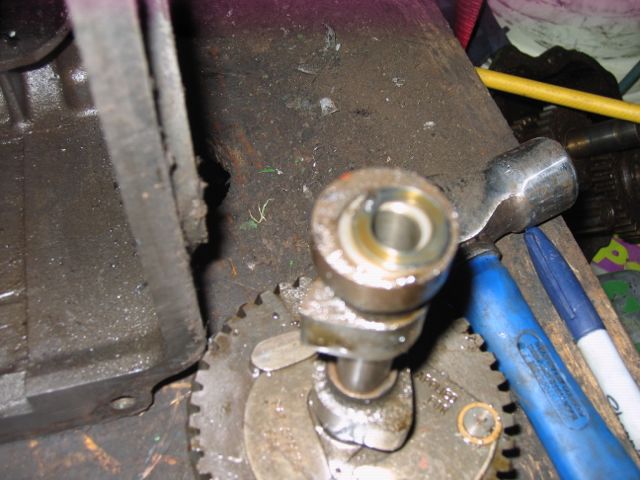
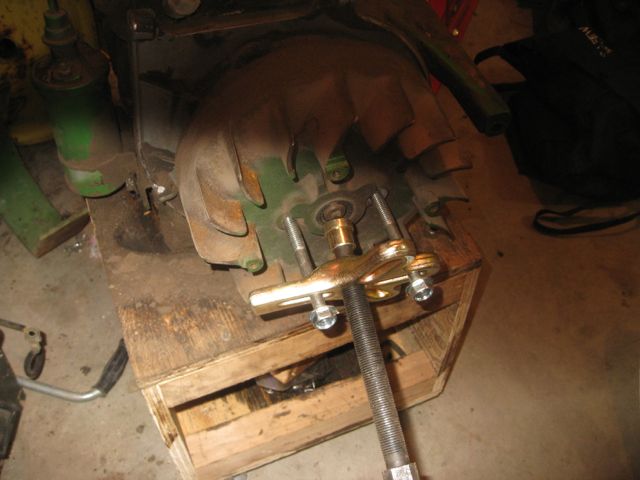
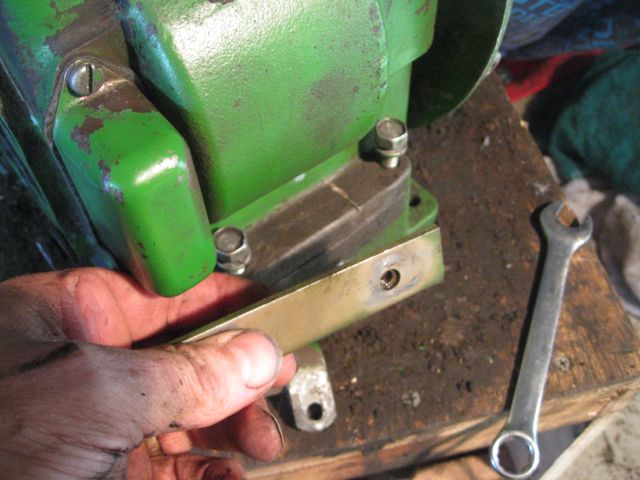
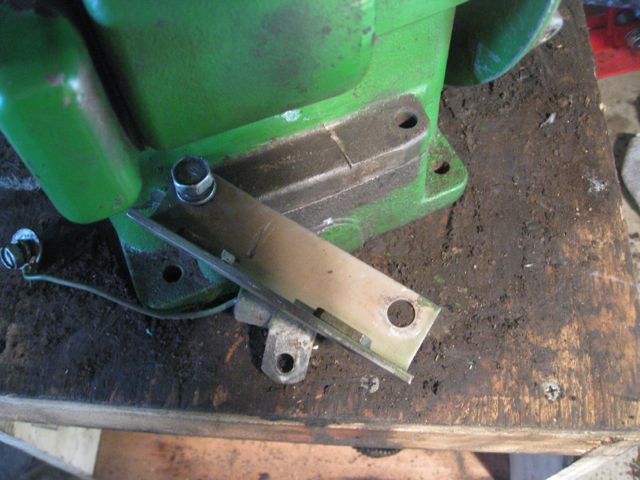
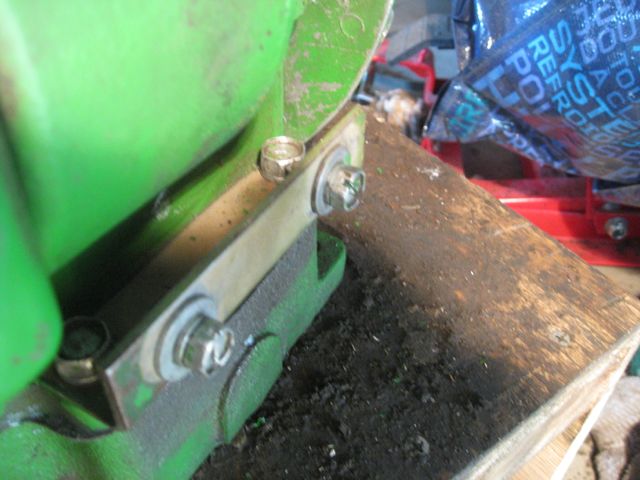
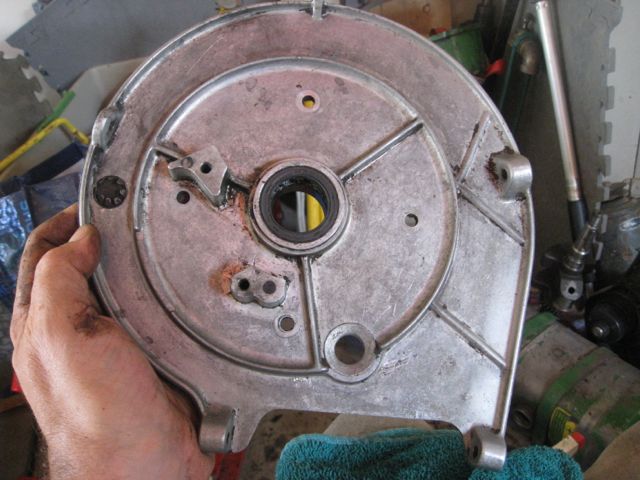
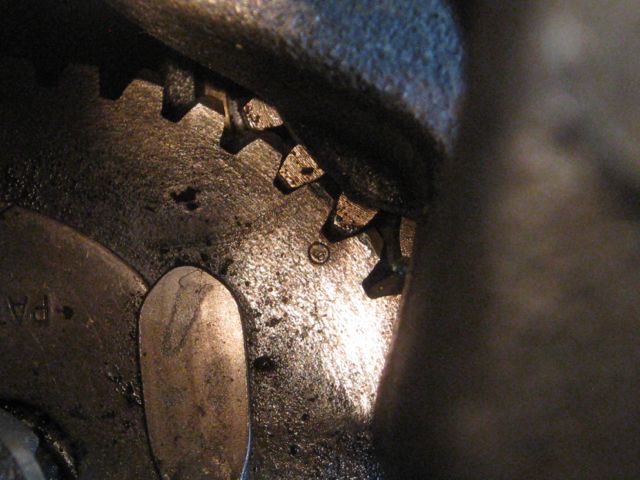
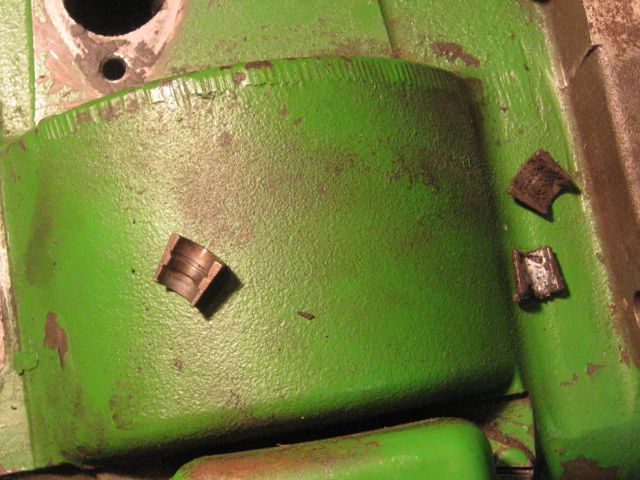
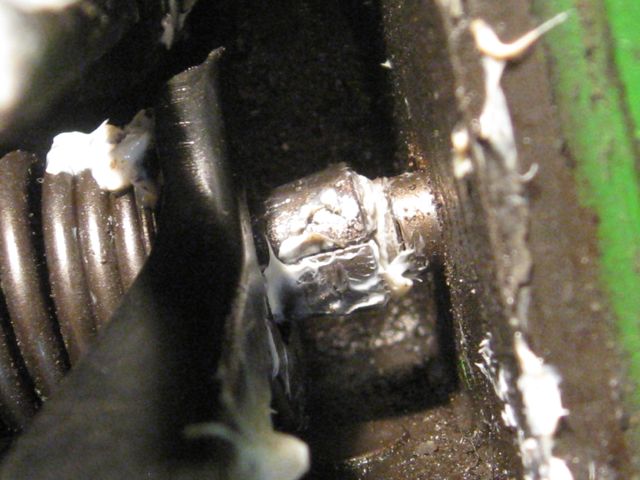
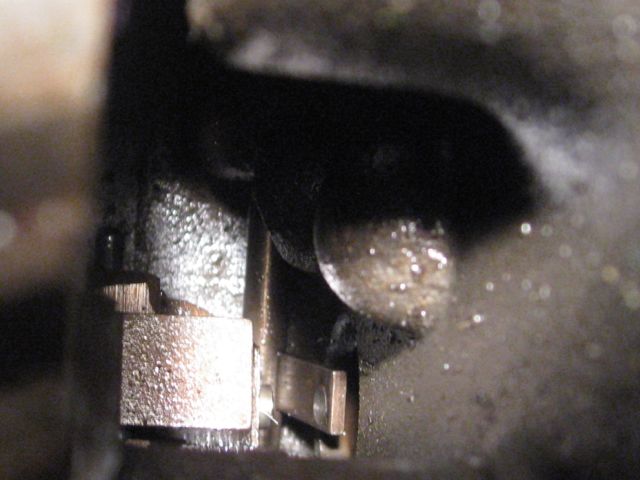
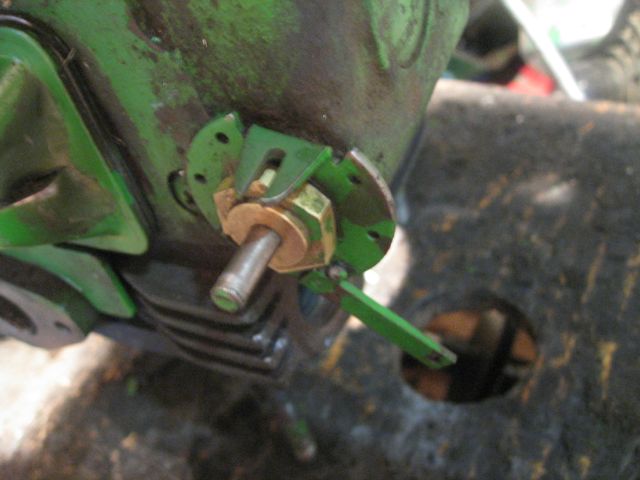
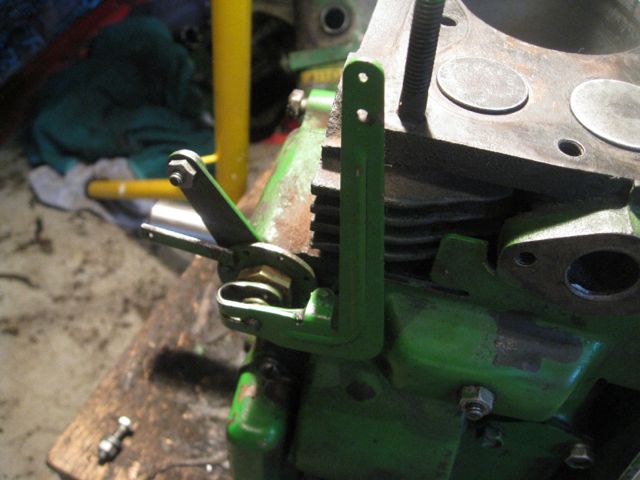
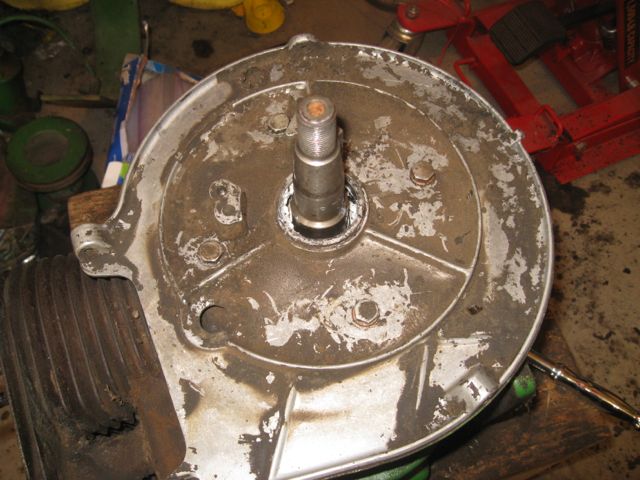
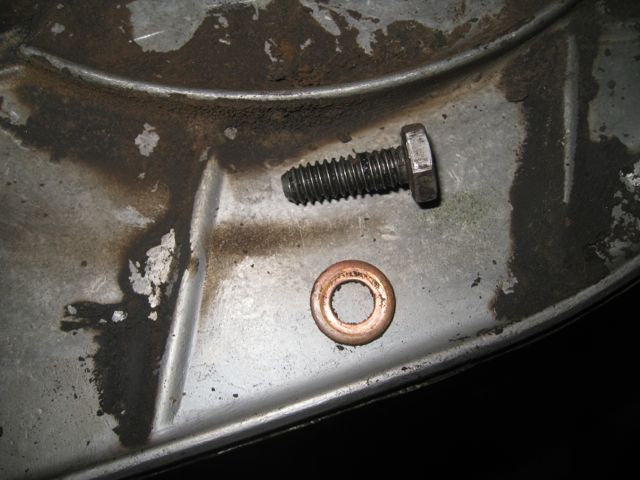
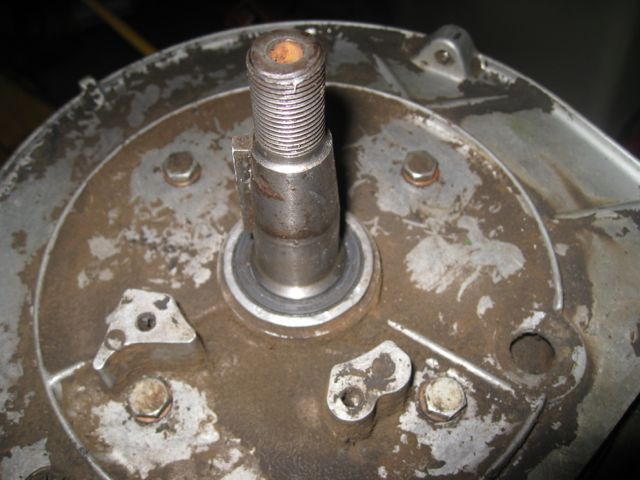
Figured I’d try to remove Cranky’s flywheel before pulling the engine, just because… And I discovered a neat trick… I had a heck of a time with Wally’s engine, holding the flywheel still while I pounded on the nut… So… took my big 1 1/16 wrench and wedged it like so…

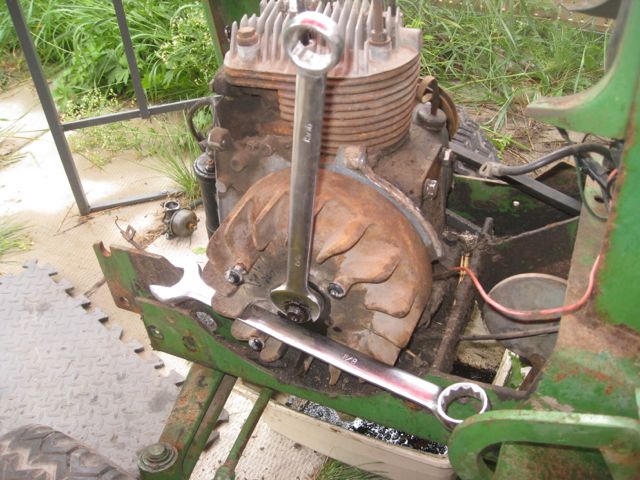
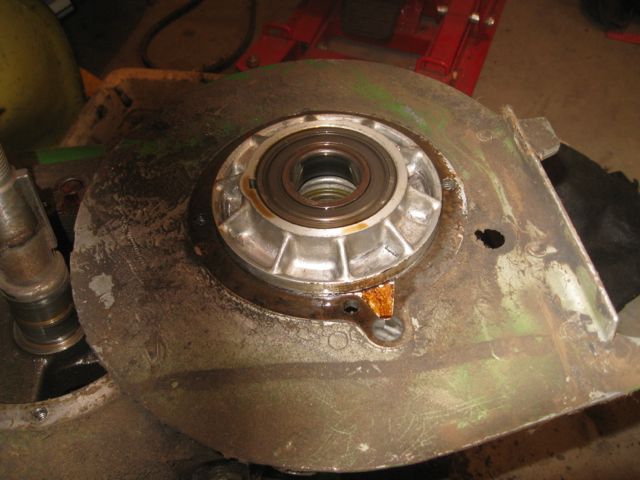
Worked like a darn! Without even breaking any flywheel fins! Which is another good point, I can use this flywheel on Wally’s engine, since his has a broken fin! Broke out the puller, and…. BAM!

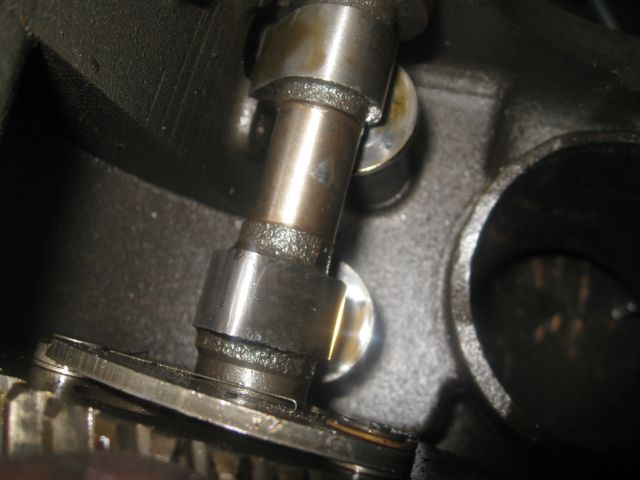
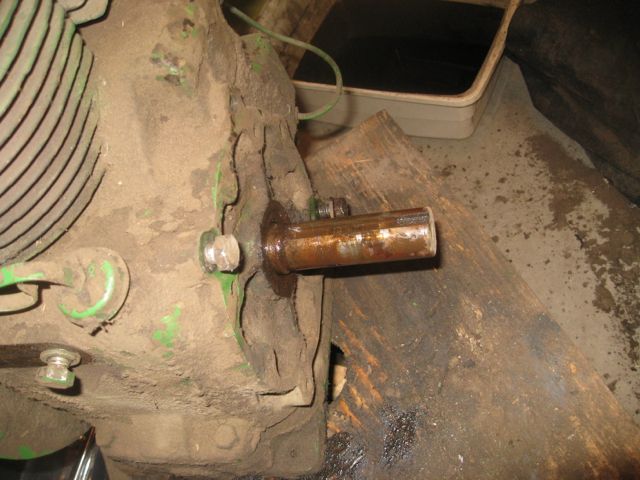
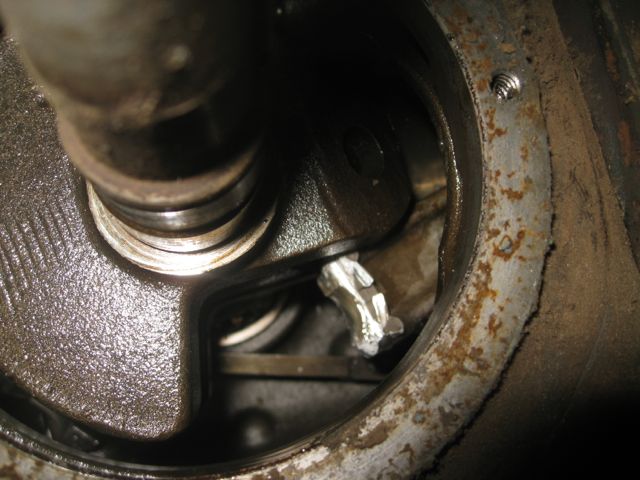
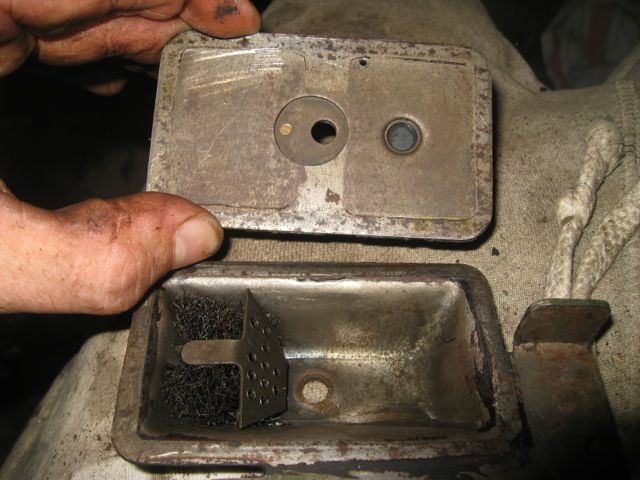
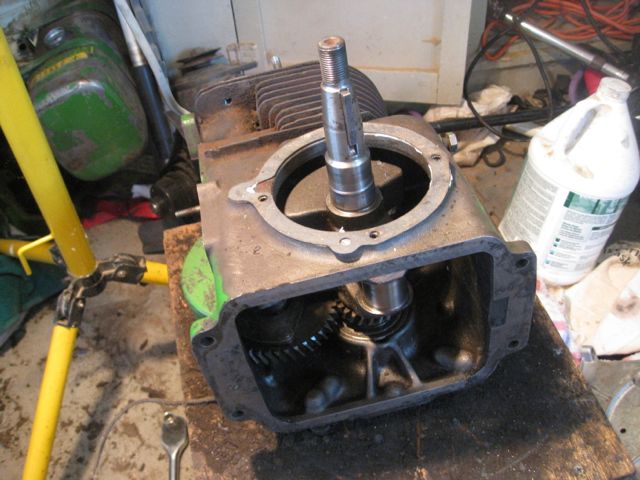
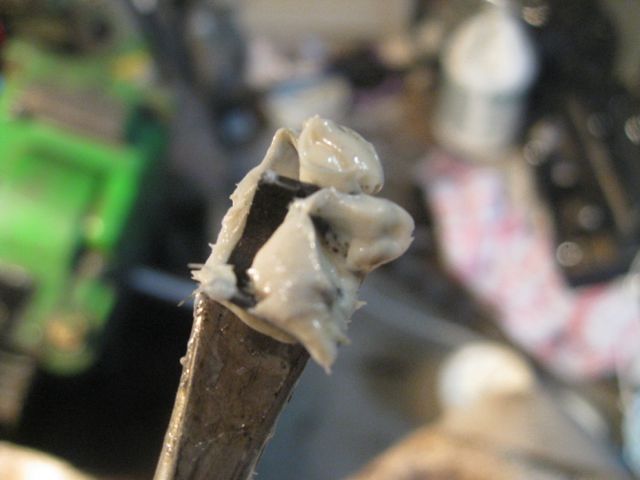
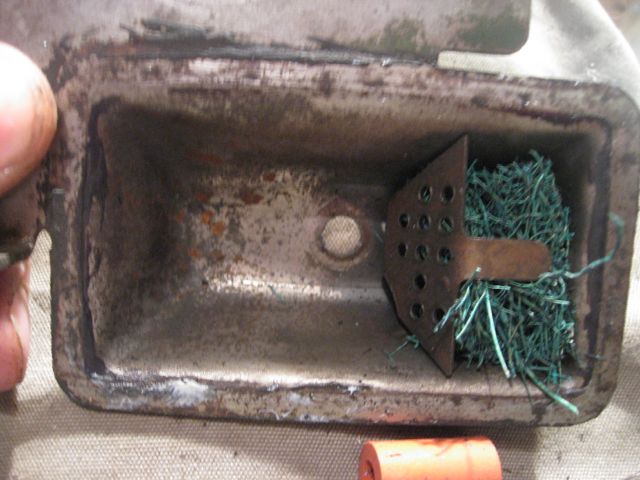
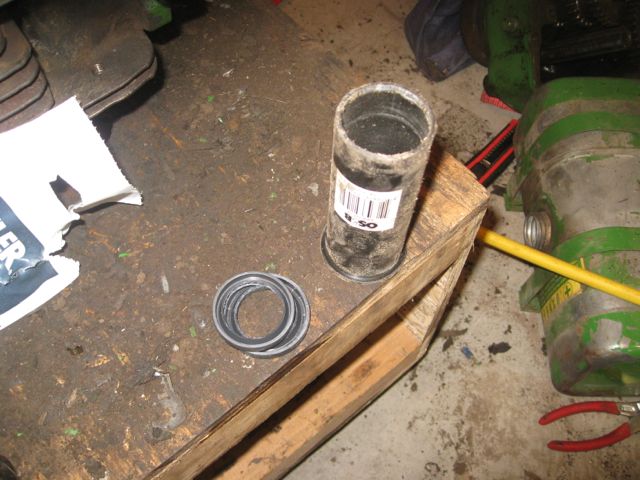
Then I crawled underneath Cranky to try to drain the oil, and I was in for another pleasant surprise! Guess what I found?!?!

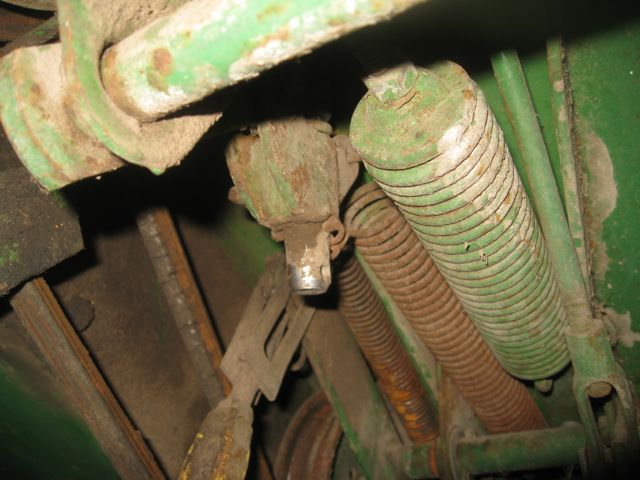
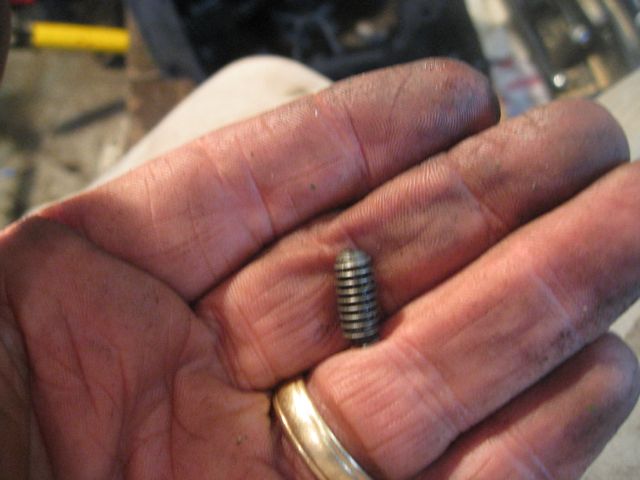
I had NO IDEA the helper spring on the round fenders was THIS BIG! Its HUGE! Now, I don’t know if its really required on the hydraulic lift, but it would be a nice addition to Ernie, then…

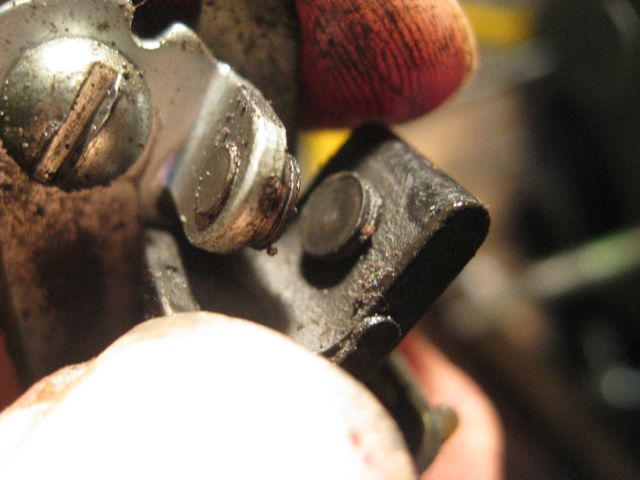
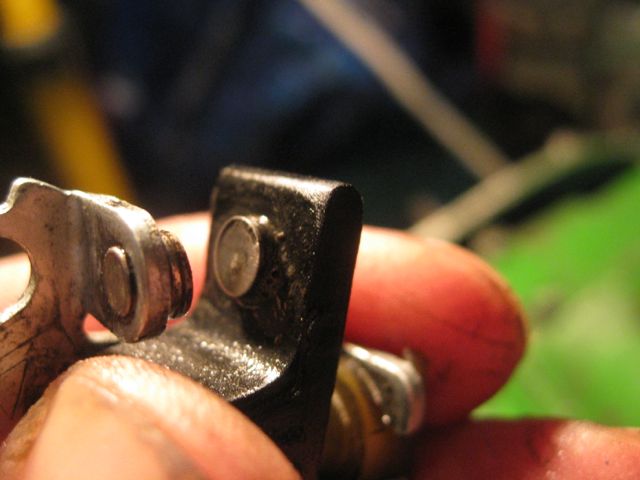
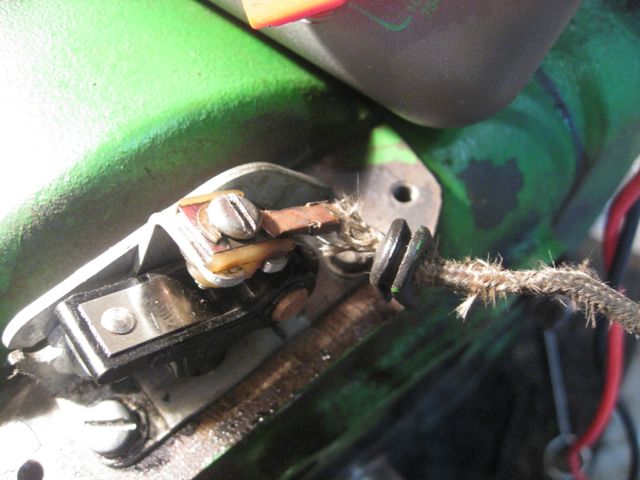
I also noticed that somebody must have redone all the electrical on Cranky as well, because the wiring harness looks nearly new… AND he has his neutral start switch intact! He’s just a gold mine for parts! Rims are good, looks like I can scavenge some 3/8″ clevis’s for another project I might have starting soon…

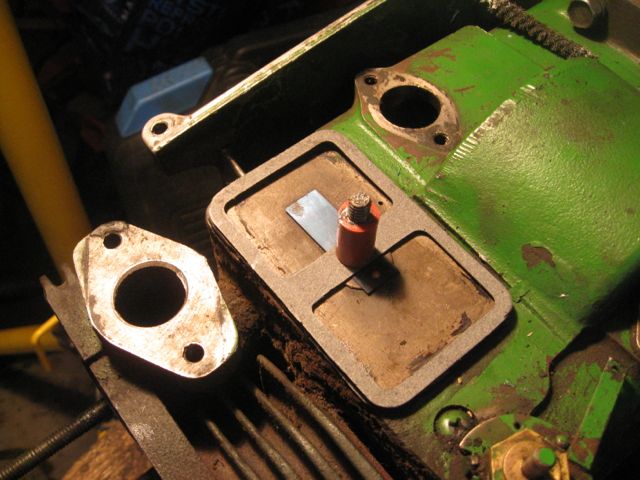
Just too bad about the rod. I’ll have to rip into the underside of his engine and see what I find… I just don’t get it… Somebody put in the effort to get Cranky a helper spring, put a new generator belt on and redo all the wiring, but then they strapped the WRONG carb on, and ran it at half-choke all the time? Wouldn’t THAT be what caused the thick black soot all over the cylinder and head? Running it rich all the time like that? Which would then have caused overheating, I’d guess, having that much carbon buildup… The post-mortem on his engine should be interesting…

Posted in Cranky, Restoration Plan Omega | Tagged , , , | Leave a comment

reergdafgdfsgsg

Here’s a cool tractor pic

Posted in Uncategorized | Leave a comment

Got the rings, made some progress on Wally!

Well, took a sorta-part-day-off, did some landscaping, and decided I was going to try to get moving on Wally. He’s been feeling so lonely, sitting by himself under his sunshade…

since I was at a bit of a standstill, because the rings, which were SUPPOSED to be here LAST Wednesday, still weren’t here this morning. So I phoned the NAPA people, said I wanted my money back, because Mother Deere could have a set of rings to me by tomorrow PM if I ordered them this morning… Miraculously, by ten o’clock, my rings had “arrived” at NAPA. Hmmmmm. Even tho, when I went in after lunch, it STILL took them 15-20 minutes to find them… So back home and into the garage to get a bustle on…

So, the rings… interesting way to package them…

Here’s the OLD ones…

Pulled them off and cleaned the grooves up (helpful tip from the work on Bror, break one of the old rings and use it to scrape out any carbon that’s built up in the grooves).

Bit of a funky different oil ring in this set, I had a heck of a time getting it in place with the spacers. Finally had to tap it with a hammer…

Used this trick from the tech manual to push first the compression ring, then the scraper ring down into the bore to check the end gap…

Here’s the ONE THING I’m worried about…


End gap on the rings half-way down the bore is SUPPOSED to be between .007 and .017… Both rings are clocking in at between .018 and .020. Uh oh… Will this mean blow-by? Well, can’t stop now!

Broke out the handy-dandy ring installer tool…

Got all the rings on…

Then broke out my el-cheapo ring compressor, oiled up the piston

and popped the piston in! Went a LOT easier than last time with Bror…

Pushed the piston down into the bore, then flipped the engine over, oiled up the crank pin and the connecting rod race…

popped that rod cap on, torqued the bolts to 200 inch/lbs (NOT foot/lbs!), undid them and retorqued them as per manual, and bent the locking flanges back up with a pair of slip-joint pliers…

Got the gasket all laid out on the oil pan, then dropped the block on to it and bolted’er on. Good thing to read the manual tho, because I would have totally missed putting on the coil mounting bracket, otherwise…

and I DID miss the fact that 2 of the oil pan bolts are 1/4″ longer than the others due to having the bracket bolted on… I LIKE how the Kohlers are styled over the Tecs, BUT this little bit here is kinda awkward to get a torque wrench into…

but I finally sneaked it on…

Getting SOOOOO close! Dropped the head gasket on…

then finally buttoned up the head and torqued it down as per spec in the manual!

So, next steps, I can’t decide… I’m sorely tempted to hike it back out to Wally BEFORE I put the flywheel on, just because it would be so much easier to torque the flywheel nut on with it bolted to the tractor… AND it would be SO much lighter to move! HOWEVER…. That leaves me at a bit of a standstill because I only have ONE engine mounting bolt until I can get out and pirate the other three from Cranky… I also have to grab the generator mounting rod (Wally’s snapped when I was removing it), a piece of engine guard (because to fit their homebuilt generator rod on, the PO did some plasma cutting on one piece of Wally) and the air cleaner housing…

So, next stop, Cranky! In the meantime, I’m going to try to clean up the electrical a bit while I can get at it…

Posted in Wally | Tagged , , | Leave a comment

Wally-Work over the past week or so!

Well, been a little busy, so I haven’t been keeping people as up-to-date as I should about where I am with Wally…. So here’s a LONG one for you… Over the past, oh, couple weeks, I’ve snuck out for an hour here and a couple hours there, then finally got a good chunk of time Friday, Saturday and this afternoon.

So on FRIDAY I decided I’d take the plunge and run Wally’s block to a local engine shop to get them to mic it (since all my eBay attempts to buy inside micrometers have been abysmal failures)… They said he was in spec! Yay! They also said I should REALLY do new rings if I’ve got it this far apart… and they figured the NAPA down the street would carry them… So I stopped off there, and dropped 53 bux to order a new set of rings… Should be here by Wednesday…. Sooooo, if I’m going to do new rings, I should hone TOO… Off came the bearing plate, AGAIN, and out came the crank (didn’t really want to hit the crank with the hone accidentally…)

Then I broke out my 3-stone hone…. Here’s pre-hone:

Here’s post-hone:

Can’t see TOO much difference between them in the picture, but I got some crosshatching going…

Also figured out how the breather comes apart… (well, actually I dropped it and it fell apart… needs a good cleaning!)

And cleaned up the bearing plate a bit more:

So that was last Friday…

Saturday, I went out and dropped the crank back in… Check it out!

(this is me figuring out how to better use the digital macro on my Canon tractor-cam!). Got the timing marks all lined up, all ready to drop the bearing plate back on… again…

But remember, a few posts back, I was wondering about torque charts and bolts and things? Well I figured I’d learned how to read the the torque chart, so I broke out the torque wrench and went to torque up the bearing plate bolts… 7/16 bolt… Chart says 35 foot/pounds… Um… okay….

Turn, turn, CRINK!
UH-OH

WTH?!?! Chart says 7/16 bolt, 35 foot/lbs… Seems like a LOT… Oh wait… That’s for a 7/16 BOLT, with a 5/8 HEAD… These are 1/4 bolts with 7/16 heads… Oh… 6 foot/pounds….

Fortunately, it snapped close to the head, and I was able to pull the bearing plate off (again) and…

(I know, I know, I’m wearing my ring! Before I start on the electrical, I’ll go drop it into the safety deposit box at my bank).

So, what to do? Well, a quick trip to the local Co-op hardware for $0.70 worth of bolts, and HERE’S my bearing plate, on AGAIN!

(these are a higher grade of bolt, hope that doesn’t cause me a problem)

Just had long enough left on Saturday to drop the valve springs and retainers in… Notice the shorter exhaust spring with the rotator on it! Unique to the 110H! Cool huh?

Fast forward to this afternoon now, which I took off due to having to work last night til about 1 am…

So, time to drop the valve keepers on… These guys are a bit different than the ones for the Tec outta the 112… They’re 2-piece collar-kinda-dealies

The BOOK says use the handy dandy keeper tool, which in the pic looks like a funky set of pliers… However, I suspect I woulda had to BUY that 40 years ago.. The other suggestion for putting the keepers on is to grease them up and hope they stick…. Sooo….

(that’s a keeper on the end of my flat screwdriver, all gobbed up in lithium grease)

Wasn’t sure how this was gonna work, but I broke out the valve-spring compressor and went to! Aaaaaand….

Success!!!! Really on a roll now! Another 20 greasy, gobby minutes, and voila!

On to the rest of the finagle-y bits! Like the breather! Changed out the old cruddy fibre filter stuff for this,

then tried to put the breather all together and drop it over the post… Well, THAT didn’t work too well, but what if I do it in layers?

Gasket…

Plate with reed valve, another gasket, the seal for the post (note the breather hole in the down position! Dang I’m good!).

And finally the cover!

Next, this is the timing hole cover isn’t it? This was the only gasket I could find that fit this piece….

On to the points! I know I should replace them, but I figure I’ll buff them up a bit and see how I do… So, before…

and after a brief buffing with some fine grit sandpaper…

Got them all strapped back into place and dropped a bit of light oil on the pushrod… Here’s the very important rubber insulator, AND another new gasket!

Also figured I should test to make sure that my points wire is good… So out comes the meter, one lead on ground, other on the wire, 0.00 ohms! Looks like we’re good to go!

THEN I made a bit of a mistake… I figured I’d clean up around the governor and the regulating disk, so I undid the bushing that held it in place…

And of course, the cross shaft fell out of place! DOH! I figured I’d have to pull the bearing plate AGAIN and futz around fixing that… Well, lets pull the oil pan off (I’d put it back on while I was doing the valves so the engine would sit more level) and see what we can do looking down into the camshaft/governor area… And see if I can play with my digital macro again!

So, THIS is looking up the BOTTOM of the engine (which is upside down on my stand, into the cavity where the governor sits. On the right is the arm of the rockshaft that gets pushed outward to the right by the governor cap (on the left) as it speeds up and gets pushed up by the force of therotating weights (this whole governor thing, I just find fascinating!)

So, once I was sure it was in the right spot, I secured it with the bushing

popped the regulating disk back on,

and put the speed control on and secured the governor arm according to the instructions!

And so, getting closer!

Just need a set of rings, and I can drop the piston and connecting rod back in!

Posted in Wally | Tagged , , , | Leave a comment

Delicious Cro-sonts (AKA man-food for breakfast!)

Well, Littletractorgal has been working hard on canning and pickling, and doing up huge posts for HER blog about what she does for canning… And I’m starting to feel a bit, um, left out here… So….

I thought, hey, why don’t I start posting some of the amazing recipes I have in MY culinary repertoire?!?! Lets start with my award-winning breakfast croissants (that’s crescent rolls, for you non-French speakers… because, of course, calling them something hard to pronounce makes them yummier!)

Step 1 – Go shopping to the grocery store WITHOUT your wife (or if she’s there, and sees you pulling suspicious things off the pre-made baked goods shelf, tell her you’re going to make her breakfast in bed!). You’re looking for the things that come in the tube that looks like this:

(Well, SORT of like that… I’m not trying to be brand-neutral or anything, I just didn’t think to start taking pictures until after I’d started assembly…)

Step 2 – Open the tube. As these things are vacuum-sealed, this step MAY require safety goggles… It certainly gets your heart-rate up, early in the morning, because there’s no guarantee about what exactly will make that little tube of goodness go -POP!-… I’ve found, over the years, that if I peel the label off and then twist in a diametrically opposed direction on either end, I can USUALLY control the process well enough to prevent too much flying debris. Remove the dough from the tube…


(this is what your tube should look like AFTER removal of the dough… )

Step 1a – find a baking sheet to put the dough on… Experience will teach you to do this step in the proper order…

Step 3 – Assemble the pre-perforated triangles of dough into the rolled up crescent rolls on the baking sheet. Sorry, I don’t have pictures of this crucial assembly step, as, again, I forgot to start taking pictures… But some advice I CAN give you is – Start rolling them from the wide end! This is very important!

ADVANCED STEPS – At this point, once you’ve been through the whole process a couple of times, you can start doing some customization to the rolls. For example, one family favorite is to place grated cheese on top of the raw dough and roll it in, to make CHEESY rolls! IMPORTANT NOTE – the rolls do NOT hold a lot of cheese, so be aware of how much is being added.

Here’s the assembled rolls on the baking sheet, ready to go into the oven:

Step 4 – Bake the rolls in the oven at 375 degrees for 11-13 minutes. The amount of time is a subject of heated debate, as some family members like the rolls a little gooey in the middle and some don’t. Careful trials and experimentation is required to find the perfect baking time. This may also vary by oven, so your mileage may vary.

Step 5 – Remove from oven. This is a VERY IMPORTANT STEP!

Note, it is very important to space the rolls out properly on the baking sheet, in order that traumatic things like THIS don’t happen during the baking process… The rolls tend to expand when cooked…

Viola! (That’s French again…) The finished, delicious product! Enjoy with spreads such as margarine, or (if you’re feeling up-scale) jam!!

(the little green thing is a sprig of basil, apparently… You don’t HAVE to eat it, but LTGal thought it would make things look more, um, Haute Cuisine…)

Posted in Man-Food By Littletractorguy | Tagged , | 1 Comment

Teeny tiny bit of work tonight…

Got home from day job, changed into grubbies, then out to keep going with strapping Wally’s K181 together… Got the bearing plate in and snugged down…

BUT….

Here’s a question! The manual says torque the bearing plate cap bolts according to the torque requirements on table 10-8…. And there’s nothing there for the bearing plate bolts. Any suggestions what people figure I should torque them down to?

Here’s a cap bolt and its BRASS washer… Why brass I wonder? They were specific about that in the manual, that the washers were brass…

So, next step is the oil seals… So I dug out and grease up the oil seals that I had in the seal kit from Ernie’s PO. I didn’t realize the K181 took two different sizes of oil seal, so got a little extra greasy figuring that out. Like my oil seal tool? Works pretty slick!

Here’s the flywheel-side oil seal in…

(I make it look so easy, in the pictures… You all missed the part where I drove it in too deep, had to pull the bearing plate again, fish out the oil seal, get the bearing plate gasket all lined up again, then drop the bearing plate on again…  )

Got the PTO-side oil seal in, but didn’t get pictures because at that point LTBabe called potty, then I had to break off my short work session… Now she’s all tucked in, but LTGal’s out to a bike co-op event so I’m hanging out on the interweb again…

Default Teeny tiny bit of work tonight…

Posted in Wally | Tagged , , | Leave a comment

Pictures from the backup camera

Okay, just cuz you guys asked nicely… Here’s the few pix that turned out from my standby camera yesterday… When I finally found my old card reader…

The camshaft, with the pin rides on, sitting in the side of the block…

Another shot of the camshaft itself, a bit blurry… the macro on this camera is a bit flakey

A nicely lapped valve seat…

And here’s the intake valve

(not much point to this shot, I just thought it was purdy!)

Posted in Wally | Tagged , , | Leave a comment

An afternoon with Wally but no camera…

Well, took the afternoon off to work on Wally a bit… Unfortunately, I couldn’t find my good camera so I’m without many pics from this episode… Finished doing a thorough check of the governor gear, it looks good. Figured out how to pull the camshaft out (that’s kind of a neat way to have the camshaft mounted, on a long pin that runs through it) so that I could pull the tappets and inspect them both. They looked really good, as did the camshaft, so I lapped the valves, then popped the tappets and camshaft back in, now I’m starting reassembly… One thing I did notice about the crank was that the bearing on the flywheel side did NOT have a guard on the inside of it, and the manual is VERY clear that the main bearings should NOT be exposed to crankcase oil… Soooo… I pounded the bearing off, gently, then did the crank reassembly. I matched the timing marks on the crank and the cam shaft up, and started putting the bearing plate on, but then ran out of time… Hopefully more tomorrow or Wednesday…

Posted in Wally | Tagged , | Leave a comment

Digging into Wally’s engine

Whoo HOO! Bet you can’t tell what’s in THIS box!

These two just showed up today, so I decided to take a break from landscaping and get down to some work on Wally’s engine…

Once I had changed THIS out (after briefly losing one of the wrist-pin keepers when it went “spang” off the pliers…

Cleaned the piston face a bit, it came out of the block looking like this…

Rings look good…

camshaft is pristine

IMG]https://www.littletractorblog.info/wp-content/uploads/2012/07/wallycam1.jpg[/IMG]

block, cylinder and valve seats look okay

Found that the wire from the points was broken, so fixed that. I was able to, using a hammer and screwdriver, free up the keeper on the intake valve from the ring the valve spring sits on..

Next steps – cleaning valves, cleaning block, pulling the camshaft and re-lapping the valves. These kohler’s are sure nice little engines to work on!

Posted in Wally | Tagged , | Leave a comment

More good and bad news

Well, got back out to the garage tonight after the kidlet was tucked in and I had all the laundry put away, with the intention of getting started tearing open the 8 horse Kohler outta Wally… I figured, I could at LEAST put in some effort, but based on how long it took me to get the flywheel and pulley off Bror, I wasn’t holding my breath that I’d actually accomplish much… So, THAT’S the good news… Either I’ve gotten REALLY good at this small engine stuff, or Bror was just SUCH A NASTY that everything else after him has been easy… (I’m betting it was the second one…).

So, figured I’d start with the flywheel… Big 15/16″ wrench and the persuading mallet popped the flywheel nut off in no time, so out came the puller. I was kinda dreading this one, because Bror’s flywheel took me 3 days… Strapped on the puller, and after one false start where I didn’t have the 3/8″ bolts in tight enough, heaved on the puller with the 3/4″ socket and….

Cool! It still made an almighty bang when it came free, but it sure didn’t take as much cursing! So, fine, but if I REALLy wanted into this engine I had to get the pulley off, right? Well, since I’m not too emotionally invested in this engine I figured what the heck, pull the set screw then go to with the persuading mallet again… ten minutes of solid beating with the mallet and…

NOW we’re cooking! Okay, so if this Kohler is like the Tec, I pull off the panel behind the flywheel, then open the side of the crankcase… I can do THIS!

Well, what the heck! Pull off the panel, and danged if there isn’t a bearing assembly there and a big hole through which I can see the crankshaft and… uh oh…

But how the heck do I get INTO this to actually see what’s going on? Oh I remember! You Kohler-type guys talk about the oil pan! I gotta take off the BOTTOM of the engine, not the side! So I flip the engine onto its side, which is when I hear the “clanky-clank” of loose bits… Pop off the bolts holding the oil pan on and…

Pull the crankshaft out through its funky access hole so I can inspect the crank race, and…

I dunno folks, looks like I’m in the market for a new connecting rod AND a new crankshaft. Pulled the piston itself, and IT looks beautiful. Rings are good, wrist pin looks like new, cylinder walls are pretty pristine… So I’m GUESSING based on what I’ve learned over the past couple years reading on here, that the oil gallery on the connecting rod wasn’t, well, oiling, and things went dry, then very hot, then the connecting rod slagged onto the bearing race. Is this a common thing for the K181? Is that what I’ll find if I ever get time to rip into Cranky?

So, on the upside, its been a LOT less work that I thought it would be to get to this stage. On the downside, this engine is toast, I figure… So, question time:

– What do you guys think? New crankshaft? Or can the race be cleaned up and refaced? DEFINITELY need a new connecting rod… What would parts run for this guy?
– Or should I just swap all the hydraulic bits over to Ernie and make Wally a donor? Alternatively, I suppose I could swap Ernie’s engine over to Wally… THAT might be less work, except that I dunno if Wally’s drive train is good… I know Ernie’s leaks…

Posted in Wally | Tagged , , , | Leave a comment