I’d like to introduce you to….

the latest member of the Littletractor family…

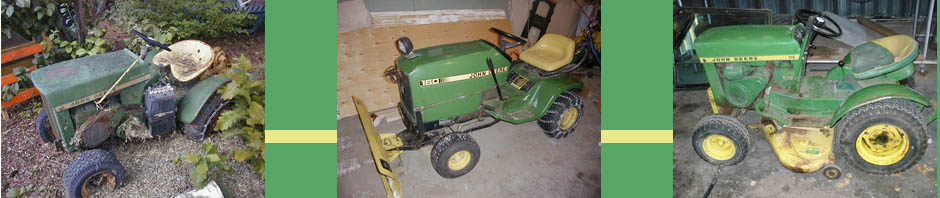
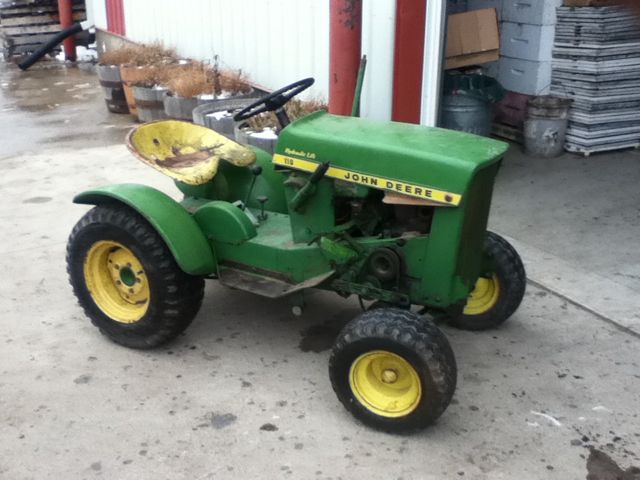
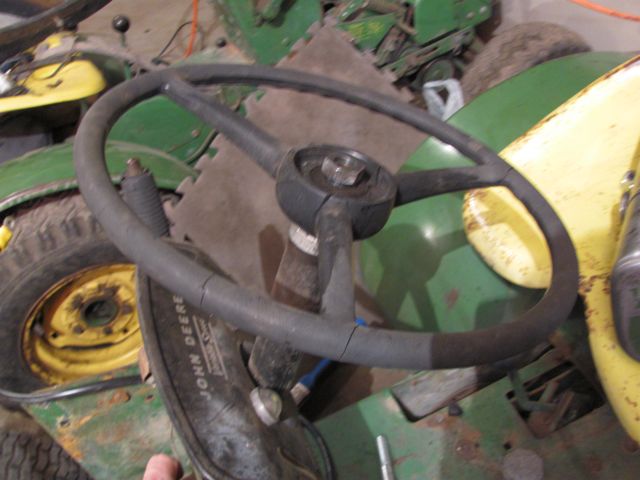
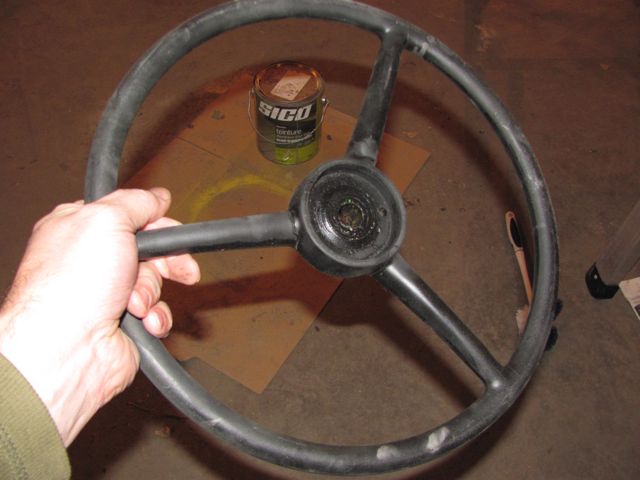
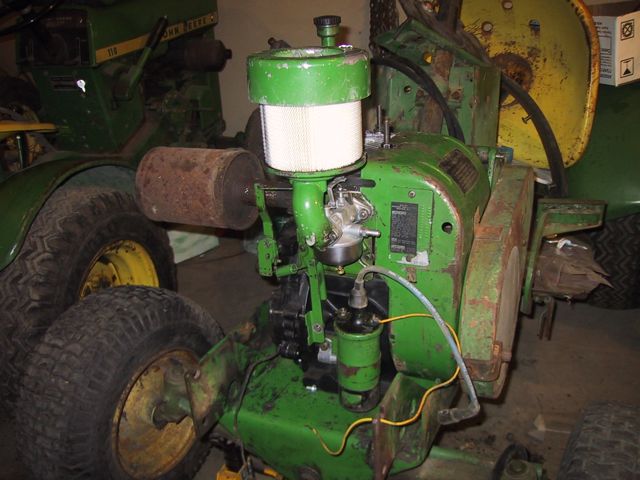
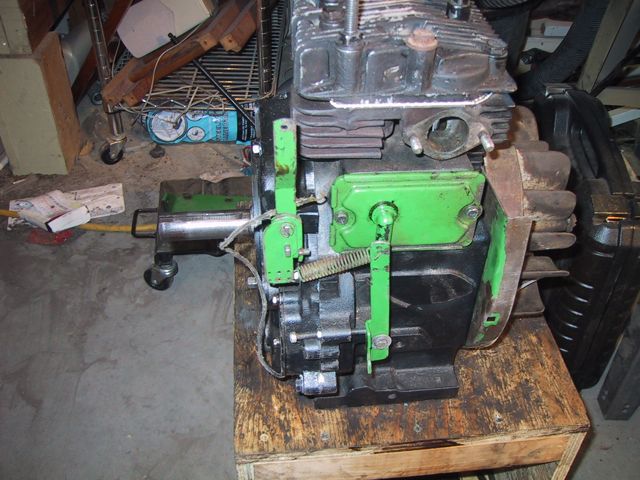
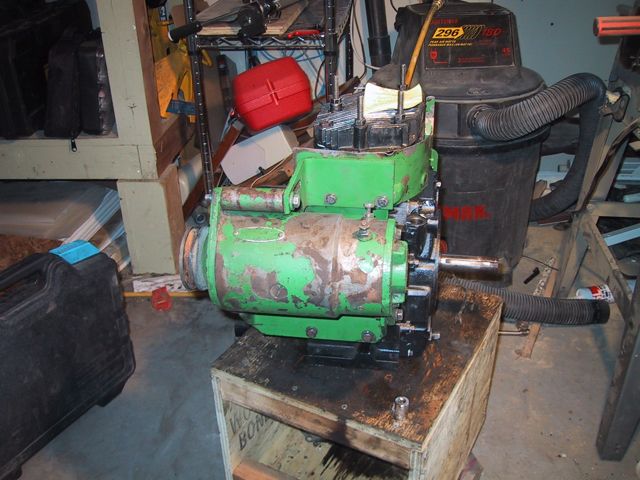
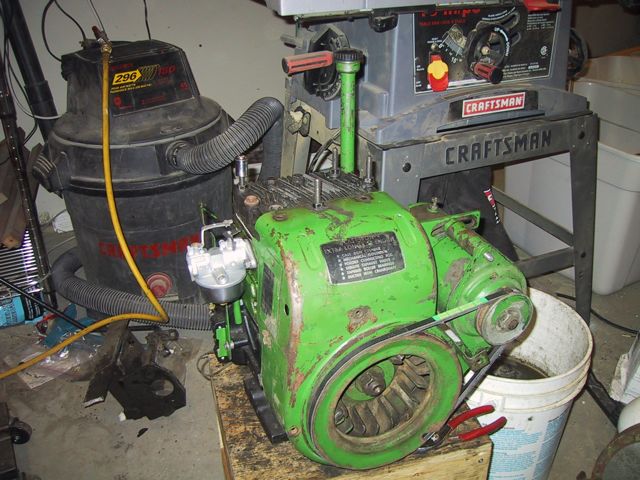
Say hello to Cranky!

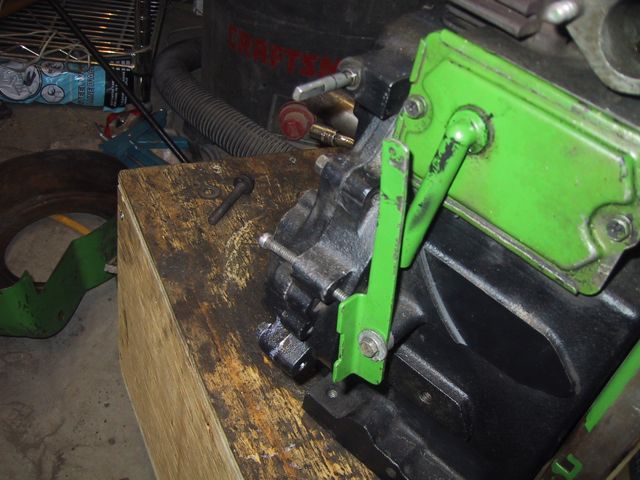
Cranky is a 1966 JD round-fender 110 manual lift (just ignore what the hood says). Cranky’s claim to fame (according to the PO) is he was found at the end of a driveway in Nevada (I believe) with a “Free” sign on him due to the snapped connecting rod (hence the name, Cranky… Connecty just didn’t sound right) and transported all the way back to Saskatchewan for (hopefully) repairs and restoration. The PO did think that Cranky was a hydraulic lift, due to the hood and the fact that there was a hydro pump hanging around with him when he was picked up… But on closer inspection (once I unloaded him), Cranky has NO hydraulic ram or hoses, and actually no rear lift mechanism at all… I’m going to have to look a bit more closely at THAT… And, looking up Cranky’s serial number (1031-042050) in my technical manual indicates he was always a manual lift… (10 – its a 110 3 – the tire designation 1- type of lift (1 = manual) – 042050 – the 1966 run of tractors). Other than the lack of hydro and lift mechanism, oh and being short a muffler, and the broken connecting rod, Cranky is in pretty primo shape for what I paid… Which is nothing… Well actually I’m trading a 140 H1 of unknown functionality and provenance for Cranky… Which MAY seem like I’m kinda getting the short end, but I REALLY like the old round fenders! He’s in a LOT better shape than I was expecting, taking him sight unseen…

Posted in Cranky | 2 Comments

Back where I was, three weeks ago!

Well, the folks on MTF inspired me to get back out and get to work…. Ran downstairs, grabbed the good battery and hiked out to the garage with it… Tossed it on the charger, thought I’d spend a few minutes out there and take stock…. Not too many pictures tonight, tho, as I found my camera batteries like the temperature in the garage less than I do… I got no pictures out of ONE of them, and two out of the other after “fully” charging it…

So, while I was waiting to see if the “new” tractor battery would do anything on the charger, I dug out the replacement voltage regulator… NOT as nice of shape as the one I HAD  
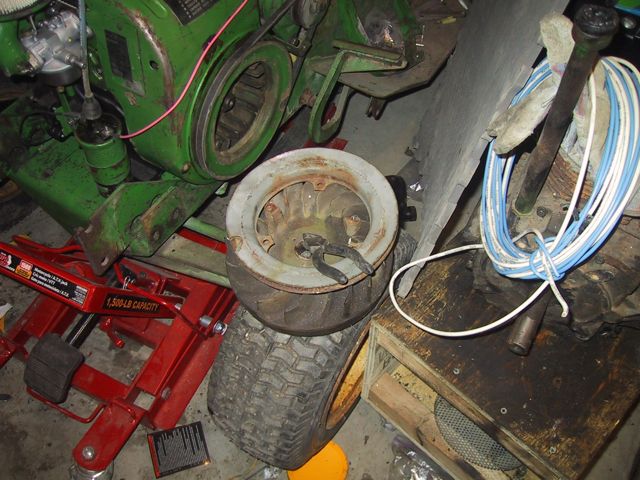
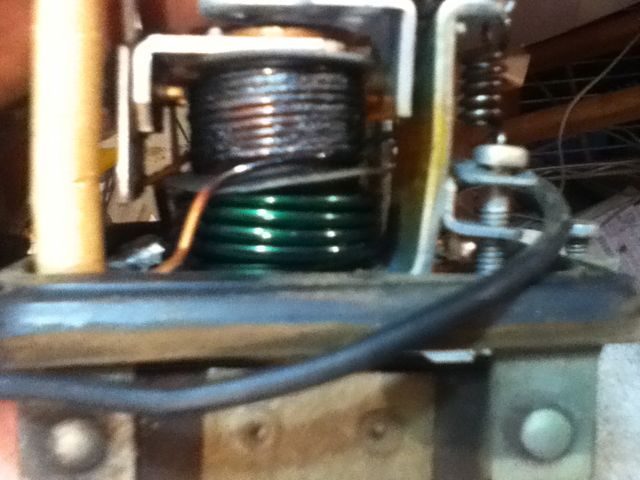
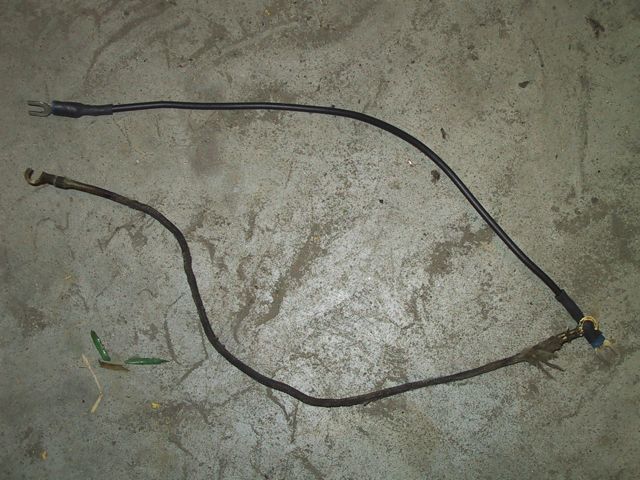
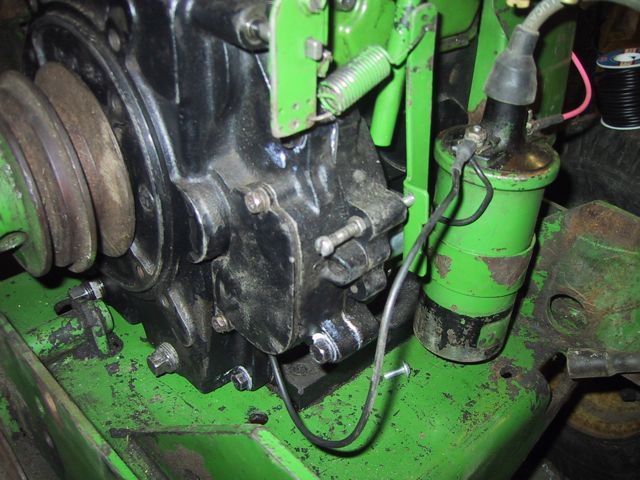
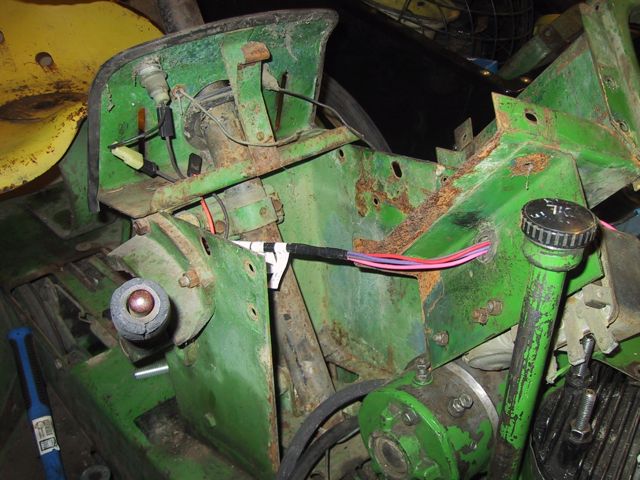
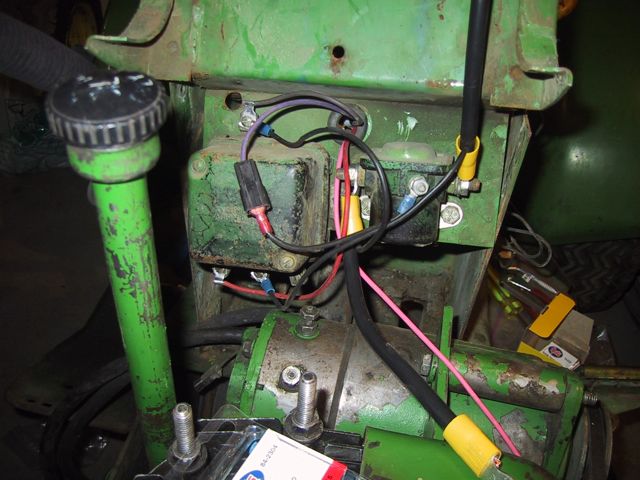
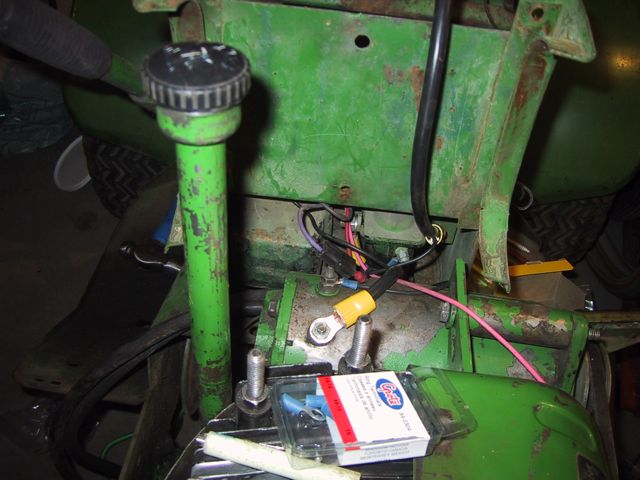
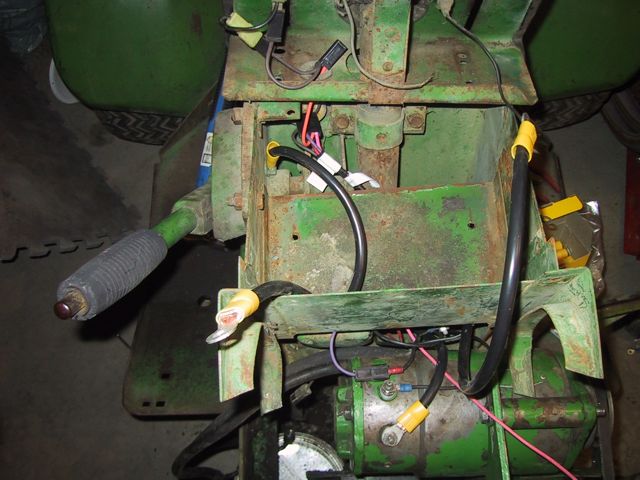
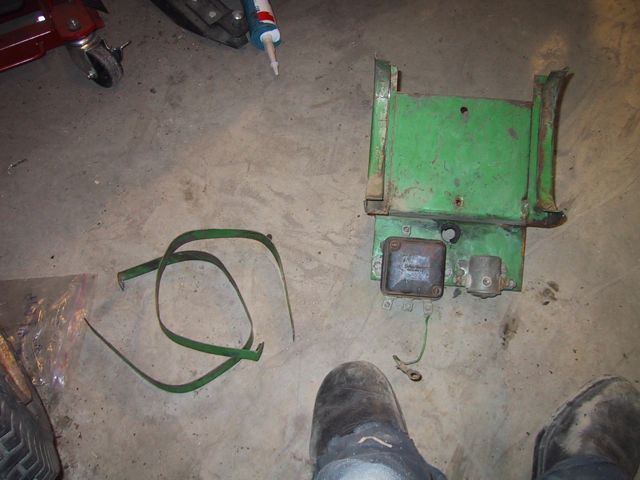
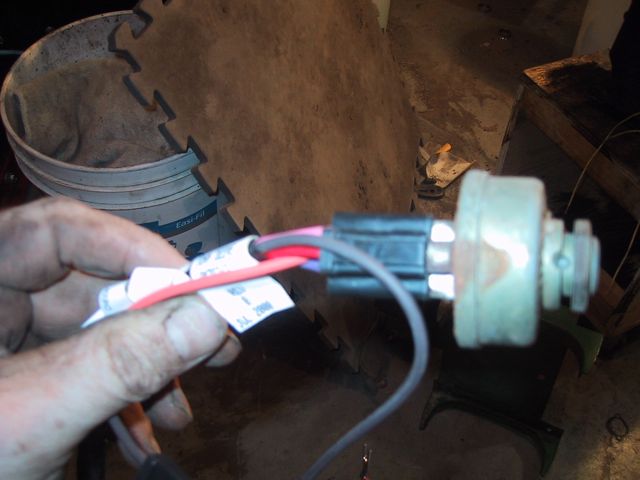
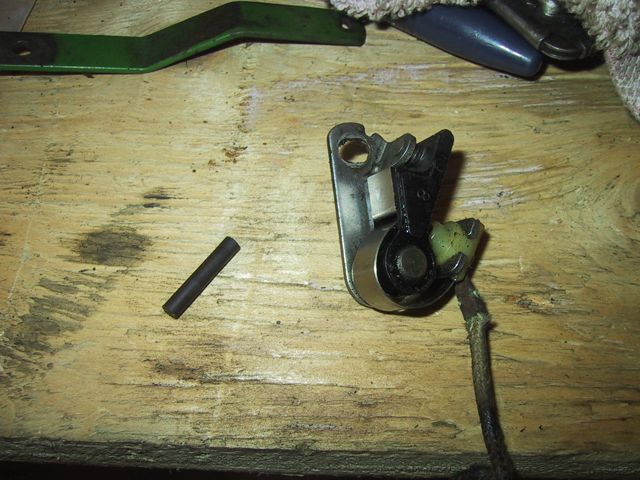
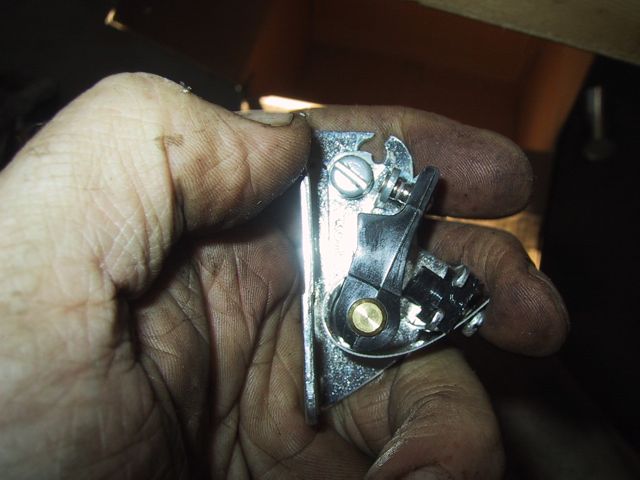
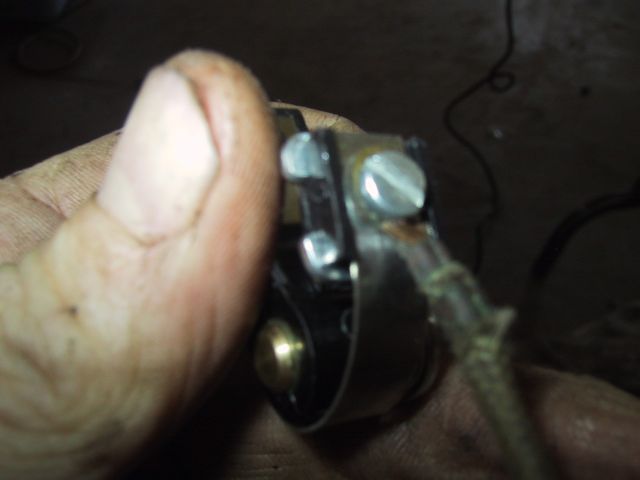
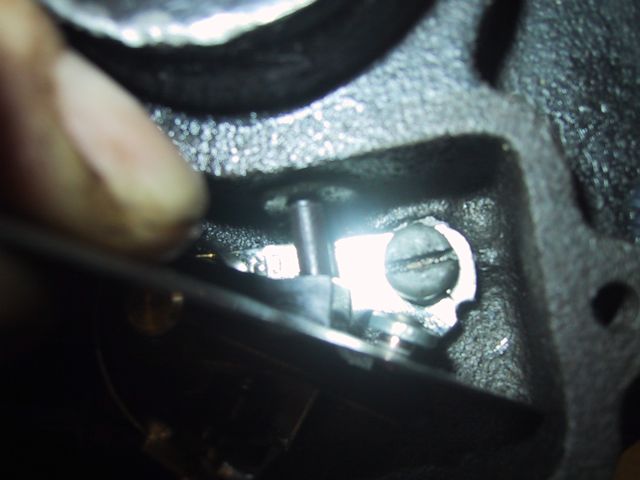
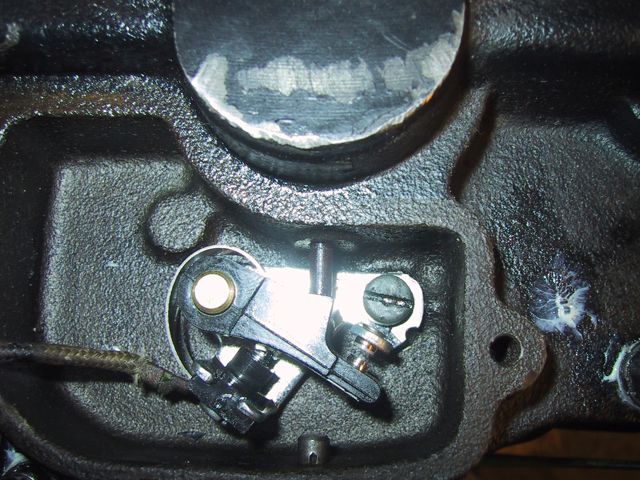
…. Some corrosion inside the case, case was pretty battered, gasket was damaged… So, swapped off the case, gasket, terminal screws and the plates from underneath the terminal screws, cleaned up all the contacts with a file and some steel wool… Dug out the new generator light assembly, went to pull the bulb out, it was rusted in place… So, cleaned it off with some steel wool, tested the bulb, no goo (no surprise)… Socket was rusty, so filed it a bit cleaner, threw some WD-40 into it… Ah heck with it, lets go for broke and rewire the tractor, while I’m already out and cold. Used some of the wiring that came with Greensail’s voltage regulator (the REALLY in good shape green field lead) that I had misplaced last time. Got’er all wired up, went over to look at the “new” battery….
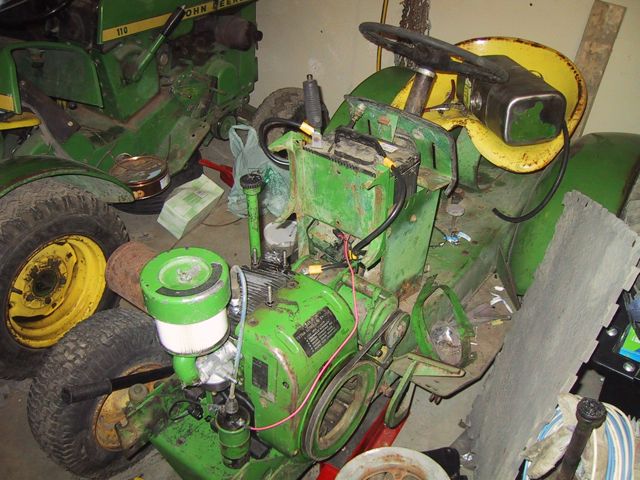
QUIZ time! 

For me to check my understanding…. When I put the battery on, the ammeter on my charger didn’t even jiggle… Little spark off the positive terminal, but that’s it… Left it sit for the 2.5 hours I was out in the garage tonight… No change. Still sitting at 0 amps. THAT tells me this sucker ISN’T charging… Correct? What should I do?

a) ditch the electrolyte somehow and put fresh distilled water in it?
b) get a different, better battery?

I’m leaning toward b… Greensail, you and I should talk about your extra battery…

Okay, so, now what? I wonder…. Waitaminit, I’ve got a good battery not 15 feet away… In Littletractor! Out comes my 7/16 socket wrench, pop out the battery, whip it over to Bror, strap it in…. Following the instructions in the tech manual, I polarize the generator by briefly connecting a lead between the A terminal on the generator and the Batt terminal on the voltage regulator -SNAP-chug-chug-chug!

Well THIS looks positive! No smoke yet, good OR bad, but the generator still seems to work… Grab the little screwdriver, turn the keyswitch to on… Still no smoke! BONUS! Turn the keyswitch to start – chug-chug-chug-chug! But a LOT faster than the LAST time! Grab the spark tester, turn her over again, GOOD spark, turning over fast enough that I figure I could achieve ignition… and STILL no smoke…

Sooo… Next steps: Get a better battery (’cause I don’t want Littletractor to be outta service at all since they’re calling for more snow here soon); Strap back on the gas tank and connect the fuel line… Fill’er with gas and go for broke! THAT one I DO want other people around for, at least to help put out any fires…. Greensail, whatcha doing Saturday or Sunday morning?

So, since what would a post be without SOME pictures, here’s Bror with a reasonable battery in him, just after I cranked him over… Look! No smoke!

And here’s the replacement starter-generator pulley I picked up from the fellow in New York who sent me the replacement voltage regulator…. He also sent me a flywheel, BUT, its a bit too short (looks like it was from a Tec with early electronic ignition or something) AND it has a fin broken off too! In almost exactly the same place! Oh well… Think I’ll stay with the one I’ve got for now…

Oh yeah! ONE MORE

Quiz Question

So, as I look at the engine turning over from the PTO side (right-hand side) of the tractor, its turning COUNTERCLOCKWISE… So… Is that correct? Just wanna make sure there isn’t something terribly wrong here before I go put gas in…

Posted in Bror | Leave a comment

Got another 110 on the way

So I called a guy last week who was advertising John Deere 110 parts on kijiji… Turns out, Joe was looking specifically for parts for his J D 140 H1… A model I happen to have sitting out in my friend morris’s barn… Joe is willing to swap a JD 110 hydro round fender with a broken rod for the 140… Figured I may as well throw in what’s left of the 120 too. So, next Sunday we do the big swap…

Posted in Bror, Ernie, Tractor Repair Stuff | Tagged | Leave a comment

Steering Wheels and a Cautionary Tale…

Whoo hoo! I’ve been constantly thinking, I should replace the steering wheel on Bror at some point… Beating on it to try to take it off, in addition to the wonderful shape its in, means its NOT particularly nice…

So, I ordered two steering wheels off eBay from a guy in Wisconsin. Here THEY are!

In REALLY good shape (except for the dings where I think the speedball was)

In not-as-good shape but repairable:

I do, however, have a cautionary tale for those of you either SHIPPING things TO Canada from the States or for any Canucks ordering things FROM the US… Many of you probably already know this…. Some of you might benefit from this…

I avoid shipping with UPS from the States, because I have, in the past, been charged HUGE “Brokerage fees”. Unfortunately, I was NOT clear with the fellow from Wisconsin about my preferences for shippers….
I asked him to let me know who he was going to ship with, and how much it would be before he shipped. I did NOT say to him “DO NOT EVER ship with UPS, I REFUSE to deal with them!”. He hadn’t shipped by last Friday, so I dropped him a note…. Well his local shipping place was closed all week for Halloween, but he’d ship them as soon as he could…. WHAT? Um, okay, that MAYBE should have been a tipoff… But I emailed him back and said no hurry, I’m in no rush (steering wheels are a bit lower on the priority list than say, a new voltage regulator), get me the information when you can, ship them when you get a chance. Fast forward to last night. When we got home from supper, there was a delivery notice from UPS, saying we owed them $33 in “Brokerage fees”…. WTH?!?! The ITEM only cost $40, I already paid the guy $35 in shipping! AND I had no idea he was going to ship with UPS or that THEY were going to be my broker. So, .I read up on the Canadian Border Services Agency regulations last night on their website, UPS did NOT a) inform me that they were my broker, b) give me a breakdown of what their charges consisted of, or c) give me the option to self-declare (ie, be my OWN broker, and pay the import taxes directly to the CBSA). I called the CBSA this morning, they said my import taxes should have probably been approximately $4.00. As I understand their regulations (which I did call to get clarified), if UPS let me self-declare, as my importer they would have to deliver my package to the CBSA office in my city, where I would go, fill out the paperwork, pay the taxes and take the item…. I phoned UPS and got put through to their brokerage office… Where I was told that if I wanted to self-declare, they would have to ship the item back to Winnipeg and I would have to pick it up from there. After I said that is NOT true according to the CBSA regulations, they decided they could rescind their “brokerage fee” THIS TIME and just let me pay the taxes. Which according to THEIR calculations are $2.52…. Ha! So, on the second delivery attempt, we gave them the $2.52 cheque, and they gave us the steering wheels….

So, moral of the story, know your rights and responsibilities as an importer! It will save you money and prevent you from being taken advantage of!

Posted in Bror | Leave a comment

Argh!!! One step forward, two steps back!

So, I went out tonight, did up the bolts on the battery case, popped the gas tank on, got the fuel line connected, then put my battery in… Followed the manual and ran a lead from the battery terminal of the voltage regulator to the A terminal of the generator to polarize the generato-ZAP-Chug, chug, chug! as it turned over (and scared the hmm-hmm outta me!).

Okay so THIS is a good sign! Put the screwdriver into the keyswitch, and this is what I got!

GREAT! Really moving along! Make the movie, figure I’ll turn it over again, turn the keyswitch -szzzzzorch- o crud SMOKE! Key off, still smoke, whip the wingnuts off the battery and pull it so I can see what the heck is smoking… Smoke stops, by then I can see that the generator light lead is totally melted…

Off comes the gas tank, pull all the wiring and the key switch… Key switch still tests good with the meter, pulled the gen light holder, its pretty toast.. Wiring harness still tests good with the meter. Put the battery charger on the generator, it still turns. Battery charger to solenoid, a good thunk… Think MAYBE the gen light shorted to ground, but its too melted now to be able to tell… Take it out of the circuit, hook things back up, carefully turn the key-ZAPPOP!

Uh okay… lets not do that again….

Pull all the wiring, pull the panel, pull off the voltage regulator, pop the case on the voltage regulator…..

Pretty sure that winding is not SUPPOSED to look all burnt and melted.

Crud.

And THAT was the regulator that was in GOOD shape…. Gonna have to do some soldering on the other, ’cause there’s a bad lead on it…

Crud.

Posted in Uncategorized | Leave a comment

The Electrical…

Okay, since I’m up ANYWAY waiting for LTBabe to head back to sleep… Here’s what I got done tonight…Printed out the relevant pages about electrical system from the tech manual, then did a really good read about how the system works, then headed out to the garage… Brought out my meter and my vice grips for crimping 4 gauge connectors on, found my smaller crimping pliers out in the garage (thank goodness, as I’d been looking for them…). Decided, after reading up on how the starter/generator works, that I might as well throw the battery charger onto it to see if it spun up… Sure enough, off it went, not drawing a whole lotta current, either… So, IT’S likely good to go… The solenoid I got from Greensail did a nice healthy “THUNK” as well, and his keyswitch appeared to work, and his voltage regulator looked like it was in better shape, AND his battery tray… So, I set to with hooking up the new wiring harness and creating the other cables…

Here’s the new harness hooked up to the keyswitch…

And my new breaker point lead… Can you tell which is the new one? Pretty sure this wire IS heat resistant, as after I used my soldering pencil to shrink the heat shrink (just the shank of the iron, not the tip, so it doesn’t melt right through) I tested to see if the wire melted when I hit it with the iron… No…

Here it is installed… Had to gap the points again as well…

Threading the harness through the rubber grommet to connect up with the regulator and solenoid…

How the solenoid hooks up to the harness and the voltage regulator… That’s a foot’s worth of my 25 feet of 4 gauge wire there… Learned a lot about how the solenoid works in conjunction with the safety switches tonight…

Here’s the solenoid to generator hookup, and all the wire tucking away where it lives…

And my battery cables all finished up…

So, down to dropping oil into it, running a gas line and mounting the tank, then seeing if she turns over! Any other hints/suggestions for me? Anybody know if that litre of oil I want to drop in is dino or synthetic?

Posted in Bror | Leave a comment

SHOCKING! Electrical is all hooked up!

There, electrical is all hooked up…. More pics and description and stories tomorrow, as I’m bushed…. JUST hooked it up, tho… I resisted the urge to whomp the battery charger onto the system and flip the switch… Since after all, there’s a bunch of 40 year old components in there…. I want LTGal standing by to call 911 if something goes “ZORCH!”(I don’t THINK its gonna happen, as I’m MUCH better at automotive electrical than I am at everything ELSE I’ve done so far on on this tractor… I have way more experience with it… But ya never know!).
Posted in Bror | Leave a comment

Getting closer

Well, got the garage cleaned out for LTGal, did all the pre-winter cleanup (hoses away, rain barrels away, patio table stowed, snow shovel and ice chopper retrieved from the garden shed) then did a bit more halloween plumbing for kidlet #1, so I figured I could sneak a bit more time out working on the tractor….

Jacked it up and bolted in the engine, THEN put the oil drain plug in… That’s a finagly little beggar in that spot, I say…

Got the air cleaner cleaned up and installed, put on the coil and condenser…

Started dry-fitting the electrical system back in and reading up on reinstalling the regulator etc..

Figure I should check the ignition switch (start at the top, I figure, and work down), so I may nip in and grab my multimeter… This is the new ignition harness…

So, things I gotta do/need answers on…

1. Fill the crankcase with oil… I have 2 litres of THIS

What’s the consensus here? Will this do it for me? If not, what do I need?

2. Redo the breaker points lead, vis Coldwater’s excellent tutorial above!

3. Run the fuel line/buy some fuel line clamps

4. Wire things up… I suspect there’s gonna be a few trips to Canadian Tire and Princess Auto before THIS one is done…… I’m probably not going to bother wiring the neutral start switch right now, as I don’t have the drive pulley installed, and nothing is connected to the transaxle. I just want to see if the thing will start/run, then we’ll take’er apart again for the full resto and I’ll start on the transaxle…

Do you think I should be putting the drive pulley on before I try firing’er up?

5. Put some anti-seize on the muffler threads…

6. Fire it up for a test-go

What have I missed/not thought of here?

Posted in Bror | Leave a comment

Tiny bit of work done today…

Took the afternoon off today, but not REALLY to work on tractors, LTGal had to work a 2:30 to 10:00 shift today so I was on deck for parenting… Sooooo…. LTBabe and I went on a road trip…. Got HER a John Deere sucker (Well, got me one too)… and picked THIS up at one of my local Deere dealerships:

Considering the OLD one looks like THIS:

I think its a pretty good investment

(I probably paid too much, but when I did some internet comparison shopping, the shipping killed me… it brought me to within 2 bux of what buying local cost).

So, next step, bolting in… Then I start rewiring…

Anybody have any thoughts on replacing the lead on the points? The JD part is NLA, unfortunately…. Should I just get a couple of crimp-on connectors and some regular insulated wire? Or what would people recommend for a pretty extreme location like this one? Its bound to be pretty hot…

Posted in Bror | Leave a comment

Work over the past couple of days…

So, I pressed on after the unfortunate flywheel incident…

Figured before I got much more strapped onto the engine, I’d better reinstall the points…. Here’s the old ones, and the fibre rod, which I can’t get a new one of, apparently

And the shiny NEW points (actually the Kohler set, but you can’t tell!)

I strapped the OLD lead back on, which is probably a mistake, but I couldn’t get a replacement from Deere… However, I’m open to suggestions about what kind of weather-proof, durable wire I could use to replace the old fabric and rubber insulated wire…

Figured I’d better do the gapping while I’ve got the engine out and easily accessible… 0.020, just like the manual says!

All set to get the ignition system hooked up!

Got the lower governor rod cleaned up and installed,

and the rest of it…

The FIRST carb gasket back in…

The heat shield (far cleaner than before!) and the second carb gasket
(here’s before)

(and after)

The super-clean carb back in… (didya notice, I found the RIGHT governor spring? )

And then I strapped the HEAVY generator back on…

I haven’t found a starter-generator pulley yet, so I was forced to put the OLD cruddy broken out one back on so that I could drop the tin on and get the belt on…

That was all Sunday and Monday/Thanksgiving Day…

Segue to Tuesday night/Wednesday morning, Kidlet #1 wants to get more work done on her Halloween costume, so I went out with the plumbing to use the rotary tool and the bench grinder…

Here’s the plumbing she and her friend wanted…

Marking the half-way point on one of them,

Cutting it apart! DANG ya sure go through a lot of those teeny cut-off wheels, eh? Thank goodness for safety goggles

After I’d cut them, bench-ground them smooth with the new bench grinder (yay!) then sanded the rougher bits with the rotary tool… here they are…

Anyone want to guess what they’re gonna turn out to be?

We now return you to your regularly scheduled tractor programming!

Since I wasn’t tired YET, I thought I’d pop the engine back into its home…

I KNEW there was a good reason I bought this! Since I couldn’t LIFT the bloody engine with the flywheel and generator on it, the motorcycle lift and a couple of boards for sliding the motor along worked SLICK…

And….. ALMOST home free! Just have to remember to bolt it in!

(well, and get the air cleaner on… and the gas tank hooked up… and the oil plug back in… Oh, and get some oil into it… and hook up the electrical… Other than that, and a complete cosmetic restore, I’m almost done!  )

Posted in Bror | Leave a comment