Some days, I JUST don’t understand….

Okay, so I just don’t really understand…. Off I went to a local major auto franchise place that shall remain nameless (to protect the innocent) to pick up some ant-seizing compound… Now granted, I’ve NEVER bought it before so I wasn’t too sure where it would be, or what it would look like… So, I go in and stop at the parts counter and say….

“I’m looking for some anti-seizing compound, like Never-Seize…”

“Oh,” says the kid behind the counter (they’re ALL kids, compared to me), “Like WD-40”.

“No, something to apply to, say, shafts, BEFORE you put, like, a flywheel on, so that it doesn’t seize onto the shaft”.

“Oh…… Um, well, I don’t know if we HAVE anything like that, but all our GREASES are over there, and all our LUBES are up over there.”

Oh. So I look through the grease section and don’t find anything. So I go over to the lubrication section and hunt around in THERE for 15 minutes, reading labels and checking cans and so on…. While I’m standing there looking flummoxed, a friend of mine I haven’t seen for 6 months happens by…

“Hey, whatcha up to?” he says…

So I tell him my sob story about not being able to find any Anti-Seize….

“Of course they have it! I just bought some the other week… Its right over here!”

And there, tucked into a teeny tiny corner of the back edge of the grease shelf is this:

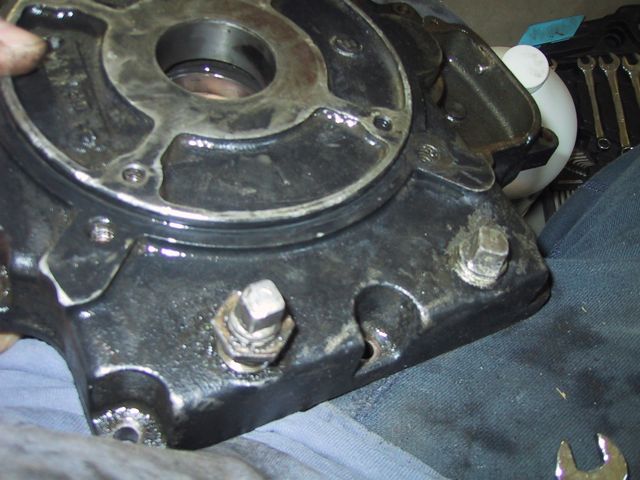
So, I make sure to go back to the parts counter, where the kid is still standing, and I say (nicely)…

“Just so you know, THIS is anti-seize…”

“Ooooohhh, ANTI-SEIZE! For like, copper-plating your shafts! Right!”

Good thing I didn’t have my big brass-handled cane there….

Some days, I JUST don’t understand….

Okay, back to installing a flywheel!

Posted in Geeky Tractor-y Stuff, Tools, Tractor Repair Stuff | Leave a comment

Whoo HOO! Found the bolts!

Whoo hooo!! Found the flywheel shroud bolts! Okay, moving on… Out to get some sort of Never-Seize to coat the flywheel shaft with!
(the bolts were stuck in the bag with the governor bits!)
Posted in Bror, Uncategorized | Leave a comment

Thursday night’s work… and problems

Got the valve springs and keepers in… Wow there’s REALLY an art to that, isn’t there? Looking at the picture, I’d say perhaps I gotta check the exhaust valve keeper again

When I was going through my labeled bags, I noticed THIS piece…. DOH! Into the crankcase again! And they even SAID in the tech manual, ensure you put the spool back in!

There it is, back in its home…

Isn’t this a PRETTY head gasket?

So, then, an hour and a half of trying to remember what order the different lengths of head bolt went in…. Now I know what I should have been carefully noting dow when I took the head off.

Of course, I think PART of the problem is that I need to bolt some of those head bolts through the shrouding…. Which of course I don’t have ON yet, because I don’t have the flywheel on… Nor do I have the shrouding from behind the flywheel installed…. To do so, I need the three little bolts I took out of THERE…… which I CAN’T find! DOH! I KNOW I bagged and tagged them…. Here’s my oversight tho, I didn’t put all the bags in one spot… I KNEW I should have nicked that sewing organizer LTGal didn’t want any more. Well, I’ll tear through the garage a few more times and see what I find… Then I’ll take people’s advice and see about buying some at a hardware store or bolt place… Except that puts me back until Tuesday now..

Well, might as well put the new breather from the donor engine on..

Posted in Bror | Leave a comment

Got the engine back this afternoon

RIP, Steve Jobs…

And after a quick supper at the parental units’, back out into the garage to see what I can get done… BIT of a brief setback, tho. While I was out on Tuesday dropping off the engine and picking up plumbing for Kidlet #1’s halloween costume, I decided to pick up a new oil seal installer…

(actually, its a PVC tailpiece for a sink drain… But EXACTLY the right height and diameter for this engine, with a bonus bigger flat side for driving the seals in… but you probably already KNEW that!)

So, got the engine back out into the garage, figured I didn’t have the PTO-side oil seal down low enough, so I thought I’d try out the new seal tool… BONK with the mallet… DOH! The seal went down an eighth of an inch too far… and crooked! Off comes the crankcase cover again! Good thing, tho, ’cause I noticed a bolt I hadn’t torqued in… And I even managed to do it without wrecking the gasket… One question tho… I can see, just from the bit of time the bolts have been in the crankcase, they’ve developed a bit of surface rust…. So I dried them a bit, checked the bolt holes, and greased the bolts… Think that’ll be okay?

Oil seal went back in well with the new tool… Now for the main event… Some pics of the cleaned up valve seat and valve….

The seat….

The valve stem…

The valve face…
https://www.littletractorblog.info/wp…leanvalve2.jpg

(So, will I need to lap this valve in, now that its been reground?)

All set for valve springs…. I think….

So, any thought/suggestions before I put the springs and keepers back in? I gave the valves a bit of a clean with carb cleaner (since I don’t have any other solvent handy)…

Other thing I got done LAST night were these two….


Got the rims all finished painting up for the 160… Now some valvestems, oh, and tires…. Just rushing before winter REALLY gets here….

Posted in Bror | 1 Comment

Area of Concern on my intake valve

Okay, HERE is my area of concern on the intake valve seat… I’ve lapped 5 times now, this spot is still there…. Got a nice band all around the valve, but THIS won’t go away… And it feels rough to the touch… Have I got a bad or pitted valve seat? What do I do about it?

(It took me 15 shots to get THIS picture)

Also, while my exhaust valve has a good .010″ clearance (at least, when I put the .006 feeler and .004 feeler together, because my gauge doesn’t HAVE a .010 feeler, what’s up with THAT, I can slide the two into the gap between the tappet and the valve no problem), my intake valve seems kinda tight… If I put the two feelers in there, then hold the valve down slightly with my thumb, I have some trouble pulling the feeler out…. Will I need to grind? And what do I do if I don’t have a bench grinder?!?! (I KNEW I shoulda bought that Princess Auto $40 bench grinder when it was on sale in August!)

Edit:
Okay, the engine is in at a local machine shop,  Precision Engine…. They say “No problems, we can clean that up just fine, AND grind your valve stem”…. I feel better now….

Now to find a way to pull the steering wheel on Bror so I can do some repairs on it and change out the dash (since I won’t have an engine back until later this week)….

Edit Edit:  and yes, I bought the bench grinder!  But it was only the $25 one
Posted in Bror | Leave a comment

Aaaaaannnd…. I probably shouldn’t go shopping unsupervised….


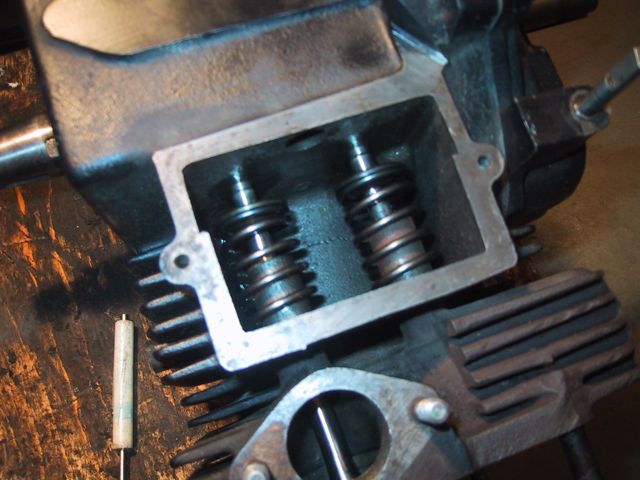
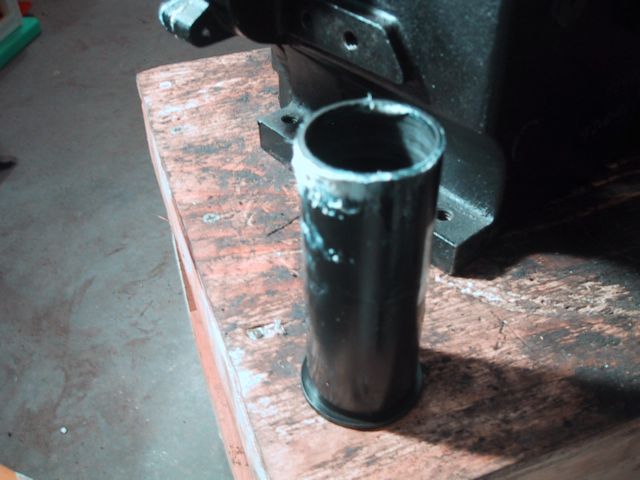
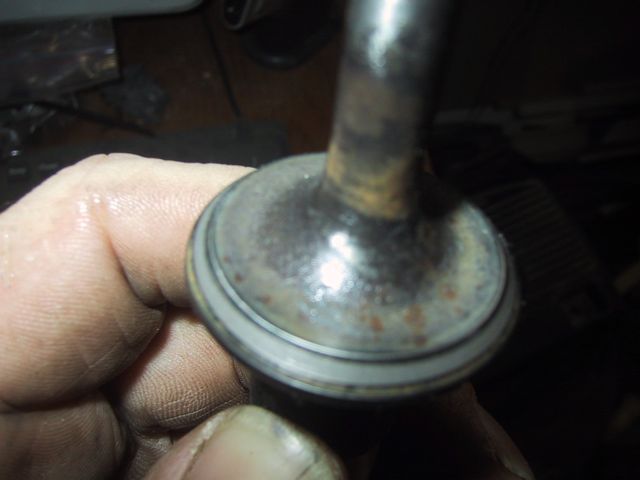
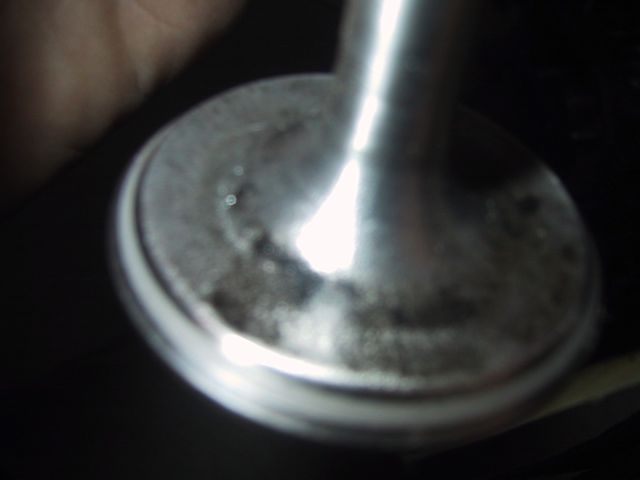
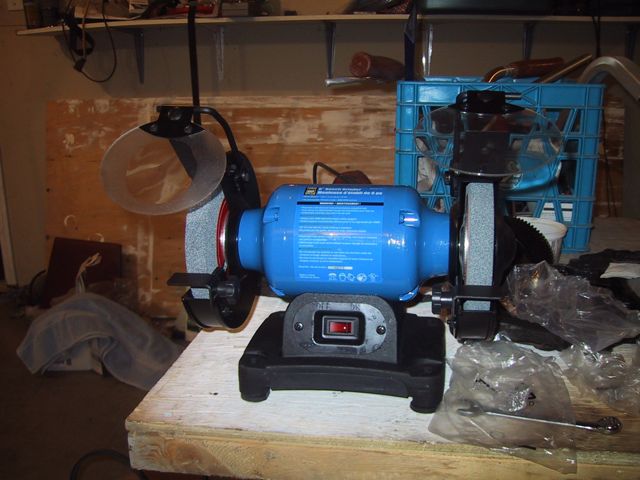
I know, I don’t have any reason for it, now that the valve stem is being ground at the engine shop…. Well, except for helping kidlet #1 make her halloween costume (you don’t want to know… at least until I have pictures)… AND it was on sale…. and I’ve always wanted one!

K…Focus! Back to tractors now!

Posted in Tools | Leave a comment

What I got done this weekend!

Well, totally crazy weekend, running kids around here and there, but wound up going out to Greensail’s place to pull some bits off a donor RF 110 (no pics of those yet, but thanks for letting me come out and mess with it, Greensail!)… One interesting thing I learned from doing that is my grandfather had been taking parts off OTHER “brands” of engine to fix up his 112…. Greensail’s donor 110 had a repower done on it at one point. Looks like the PO replaced the 8 horse Kohler with a Tec HH100 on it, the model WITHOUT points, but with a starter motor instead of a starter/generator… Not sure what model of tractor IT came off of, its painted orange, but interestingly enough, the crankcase breather on IT is identical to the one that I took off of Bror… Which is DIFFERENT than the breather I took off of Frank, my recent donor engine… Hmmm, the plot thickens! 

Also got a bit of time to do some valve lapping yesterday….

Here’s my kit..

Marking with the Sharpie

Dropping the exhaust valve in…

Final result on the exhaust valve…. Personally, I think that looks good!

The intake valve – it still has hints-o-sharpie ink on it, although I couldn’t get my macro lens to show them… So, not sure if its done yet or not…

I’m a BIT worried about THIS spot on the intake valve seat. Again, its too blurry to give you all a good look, but this is a darker patch on the valve seat, that doesn’t look like its “ground out”. Does this mean more lapping? Or do I have a seat problem?

Posted in Uncategorized | Leave a comment

Last Night’s Work….

So, as promised, some more pictures about what I got done last night….First thing I did was go after Donor Frank to pull some bits out…. On the downside, after I pulled the cylinder cover off to get at the governor rod, I found that no, Frank does NOT have the same camshaft… No EZEE-Crank Automatic Compression Release on it! 

BUT…. a perfect governor rod! And I even found the section in the tech manual that said if the governor rod was at all loose to replace it! So I DID!

Here it is, installed in the cover…

Lotsa spots talking about needing to be oiled before being put together, so I nabbed my oil can…

Tappets going back into their respective holes (see how nice my sharpie marker stayed visible on them?!?).

Got my timing marks aligned! (This looks right, doesn’t it? Line on camshaft aligned with chamfered tooth…)

Pulled the crankcase gasket out of my full gasket set that I bought so many months ago…

Here it is laid out on the crankcase…


Hope this little crinkle won’t be a problem…

And setting the cover on…. So when I went to check the torque chart in the tech manual for the HH100, it listed the smallest bolts as 7/16 head, at 10 ft/lbs of torque… But the crankcase bolts are even smaller, at 3/8 head… Should I be torquing those to 10 ft/lbs? On one hand, that doesn’t seem to be a whole lot, on the other hand, I wanna be able to get them out sometime, right? And I don’t want to crush the gasket right out… THAT’S why the numbers are so low, right?

Okay, plugs are back in (still need to tighten them), I THOUGHT I was gonna be done at this point….except for oil seals of course

But then I read the bit in the tech manual about crankshaft end play… Stick the feeler gauge under the bearing retainer, between it and the case, to determine whether you need to use the shim gaskets to increase the crankshaft end play to an acceptable amount (.0003, it sounds like)… Well, I tried to put the feeler gauge under there, no go! Uh oh….

So here’s the gaskets they shipped (I had been wondering what these were for!)

Here they are placed on the bearing retainer. I decided since, obviously my existing bearing retainer gasket (a rubber ring around the base of the bearing retainer) must be totally smushed, allowing what seemed like no play, I’d go for broke and use all three..

Then, onto the oil seals… Hey, guess what I found when I looked in my gasket kit! DOH! Oh well, lotsa spares…. Maybe they’ll fit the kohler on Ernie…

Flywheel side went in really nice with my piece of tubing and the rubber mallet.

PTO side was a bit more of a challenge, as I didn’t have a long enough piece of tubing. So, careful tapping around the outside of the tubing to set the seal in the hole, then putting it in the rest of the way with my “drift” (aka socket extension, since my drift has (ha ha) “gone adrift”!).

So, stay tuned for the next episode, where I start looking at valve gapping, lapping and installing!

Posted in Bror, Uncategorized | Leave a comment

The drift question, answered….

Originally Posted by biker3777 View Post
set the punch on the end of the rod bolt and tap it.I just use a plastic hammer to tap the rod cap on the side just make sure it is not bound up.
Quote:
Originally Posted by marlboro180 View Post

Looking great LTG.
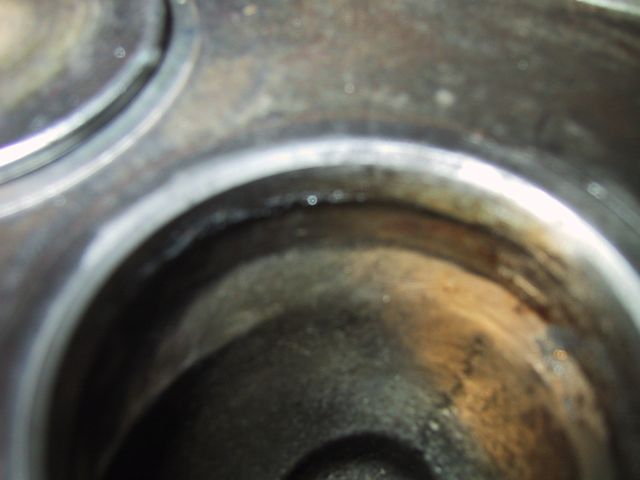
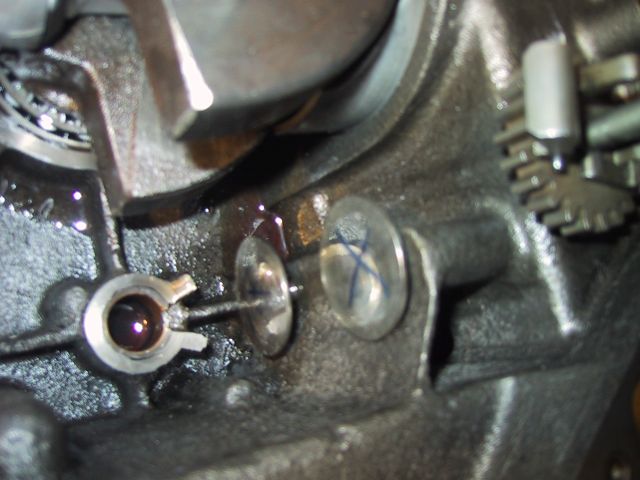
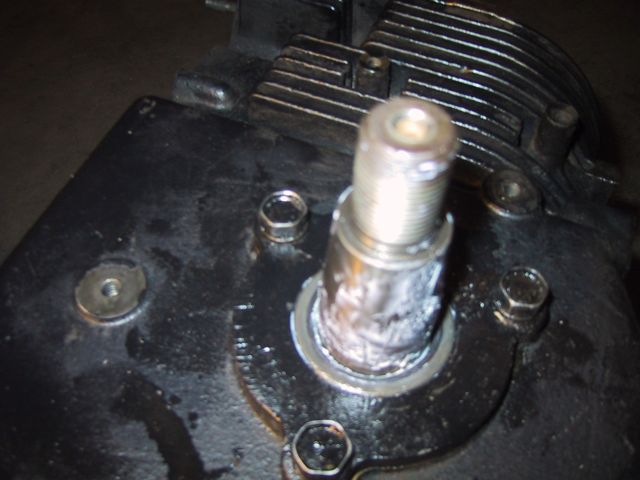
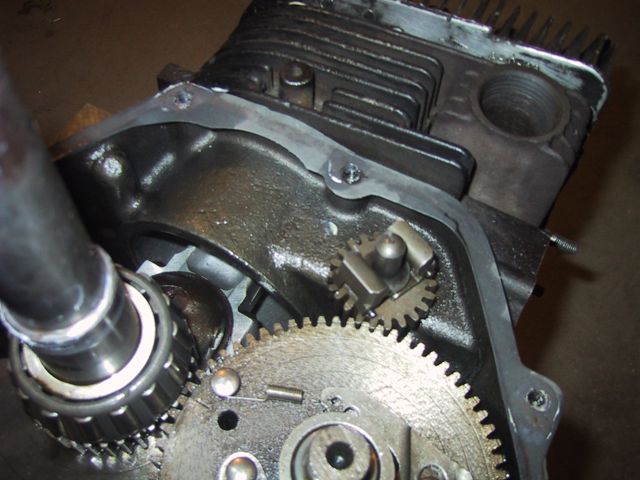
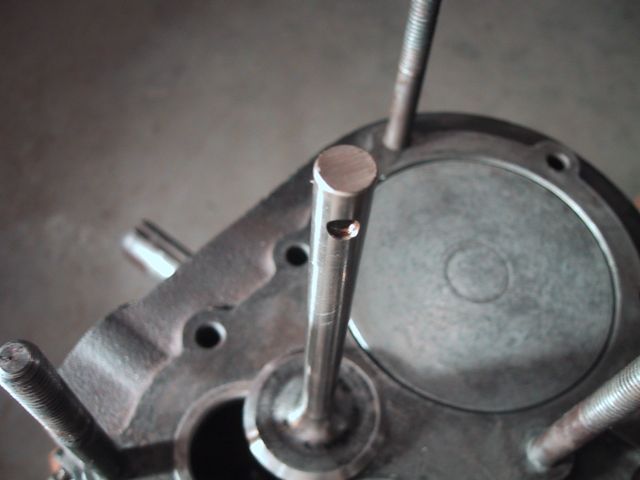
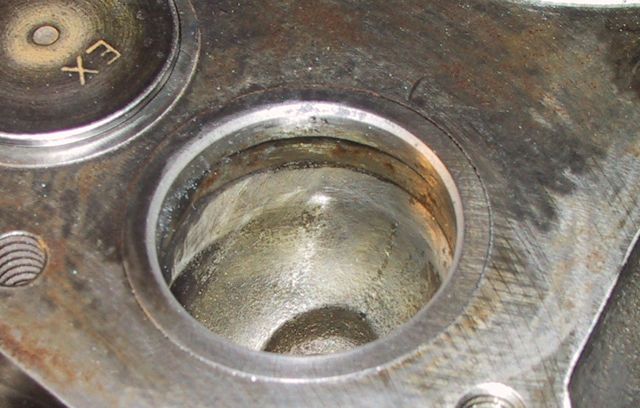
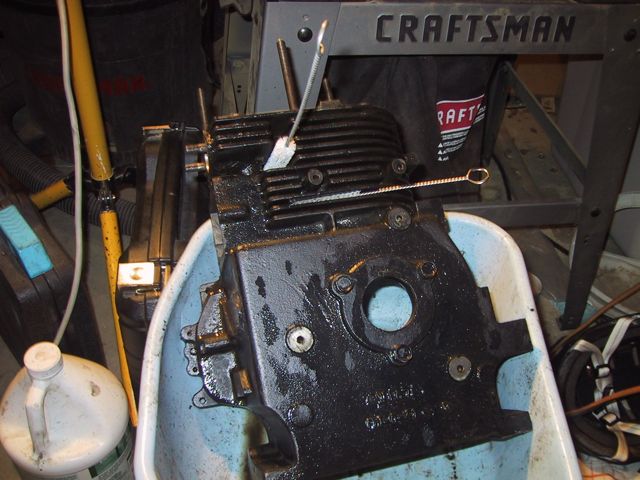
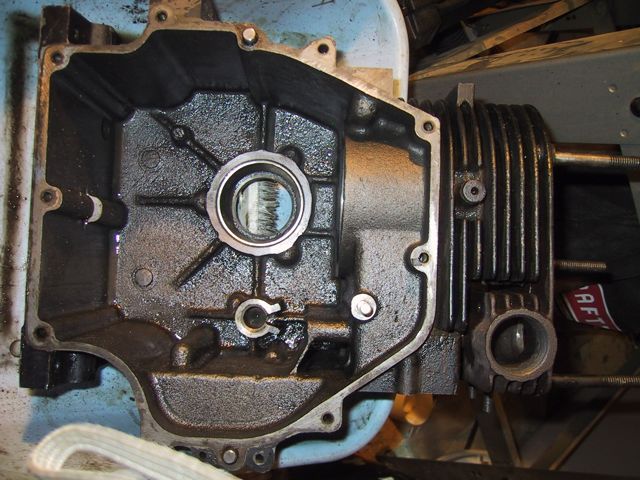
After squirting some assembly lube up into the bore from the crank side, rotate that crank so you can get to the rod cap readily.

Take that drift , and place it above the rod cap bolt nuts, up on on the cap a bit but near the nuts . Give it a couple loving smacks with a hammer. … This will help in true alignment of the cap ( and thus the bearing surface ), relieves stress from assembly should it be cocked in any way due to oil / crud/ ugly bits in between the mating surfaces. I’d bet that the way those rod bolts are assembled at the plant they are only so ” true” to one another, and smacking the cap would help that too.

Then go about re- torquing the rod cap nuts per the manual. 

Okay, so I TAP it HERE!

And assembly lube can be any medium-weight oil, right?

So the OTHER good news last night was, the governor arm that I felt was a bit loose, I can get another out of Donor Frank…. I ALSO took some time last night to pull the valves, valve springs and keepers out of Frank. The springs at least look a lot better than the ones currently for Bror… The valves weren’t as crusty, and the intake cleaned up really nice, but I might as well stay with the valves I’ve got. Except for the head, which is crusty from an electrical fire, Frank seems to be in pretty good shape…

Oh, and I ordered the light for the sandblasting cabinet the other night…

Posted in Uncategorized | Leave a comment

Started the cleanup and reassembly!

Convinced Kidlet#2 to come babysit LTBabe (since LTGal is down with the first of the nasty Fall colds  ), so I could get back to work on Bror….

Decided to cleanup the crankcase cover first, so cleaned up a big bucket, got some hot soapy water into it and set to… Well, first I figured I should make sure I had all the small movable bits off it, like the breaker points and breaker shaft,

and the governor arm (at least I think thats it…)


Of course the governor arm was held in by one of those infamous “j-clips”…

but as you can see, I triumphed! HahA! My secret was to move to the center of the garage, then take my calipers

and CAREFULLY force the clip off with the pointy bits, while holding my hand over the other side…

So, once I got the shaft out I noticed that the end piece here seems a bit loose on the shaft…. Wonder if that means replacement….

I then pulled all the rest of the plugs off the crankcase cover… What I don’t know is why these two would be there at all…

and I’m really not sure why the LEFT one looks like a fitting for, say an oil pressure gauge…

So, then a whole bunch of cleaning and scrubbing and drying, then firing up the air compressor to do a final air dry… My bottle brushes came in REAL handy (well, actually they’re cleaning brushes from a friend’s water filtration system).

I got SO ambitious, and figured I’d start on the actual crank case… First order of business, after my successful removal of the governor arm, was removal of the governor spool (Also held on by a j-clip!).

(I have to admit, the governor spool is one of the PRETTIEST pieces of the whole engine….). Of course, I paid for my hubris about C-clips by seriously puncturing my thumb with the caliper this time!

I was surprised to find a bushing/washer behind the spool…

So, now that supper’s done, and Kidlet #2’s still in charge of LTBabe, I’m gonna head back out and clean the OTHER side of the crank case…

littletractorguy is online now Report Post Reply With Quote Multi-Quote This Message Quick reply to this message
Old Today, 04:39 AM   #557
2K Poster!!! Yay!!!
littletractorguy's Avatar
Join Date: Dec 2009
Location: Saskatchewan
Posts: 2,540
MTF Member # 36339
Images: 5
Default Late night cleaning and Connecting Rod Questions!

So went out and scrubbed hard on the crankcase…


Once I got it all clean and fully dried with towels and compressed air, I set everything required for the basic reconstruction up on a table in the garage.

Then, following Oo-v-oO’s advice, I greased up my oil seals….

Too bad I hadn’t read the tech manual closely enough to realize that oil seals go in AFTER the crankcase is buttoned up! DOH! 

BUT I met my nemesis the J-clip once again, and bested him, getting the governor spool reinstalled!

Of course, once I went to put the crank in, I remembered why it was I built the engine stand… Boy that crank spins nice, tho

Then I broke out the ring compressor, and spent a frustrating hour and 3 quarters trying to master the art of inserting a piston into the cylinder via a ring compressor…. Hope I oiled it up enough, and that I didn’t get any schmutz in the cylinder in the process. I DID space the rings out as advised in the tech manual, just hope they didn’t wander too much in the ring compressor.

Finally, it went in, and I placed the rod cap on, dropped on the washers and the lock nuts and gently tightened them…

So, I digressed a bit after checking the tech manual for the torque numbers for the lock nuts… It said 86-110 ft-lbs… Okay, so I broke out the big new torque wrench, eager to use it for the first time… Read the manual, tested it on a bolt I’d pulled out of the head of Frank, the donor motor, at the lowest setting it did, 20 ft-lbs, got the click…. okay, well, lets dial it up to 86 ft-lbs and test it on the head bolt… Geez 86 ft-lbs seems like a LOT… Particularly for a connecting rod… So lets look again…. OOOOHHH…. 86 IN-LBS… THAT’S significantly less… So I dug out the trusty old Canadian Tire torque wrench and torqued to about 7-8 foot-lbs (good thing I could use THAT one tho, as the big new one wouldn’t have fit in that spot…).

Okay, now for the big stumper for the evening… The tech manual says,
“After initial torque, use a drift and a hammer (13 oz) and strike the rod bearing cap above each lock nut. This will seat the cap releasing some torque on the lock nuts. Retorque lock nuts to specification”

Okay, what the heck is a “Drift”? Is that like, a big punch? And where the heck do they want me to HIT? On the side of the rod bearing cap? I can’t see getting a hammer and a drift in to hit the ends of the bolts on the connecting rod… How the heck does this work?!?

Posted in Bror | Leave a comment